
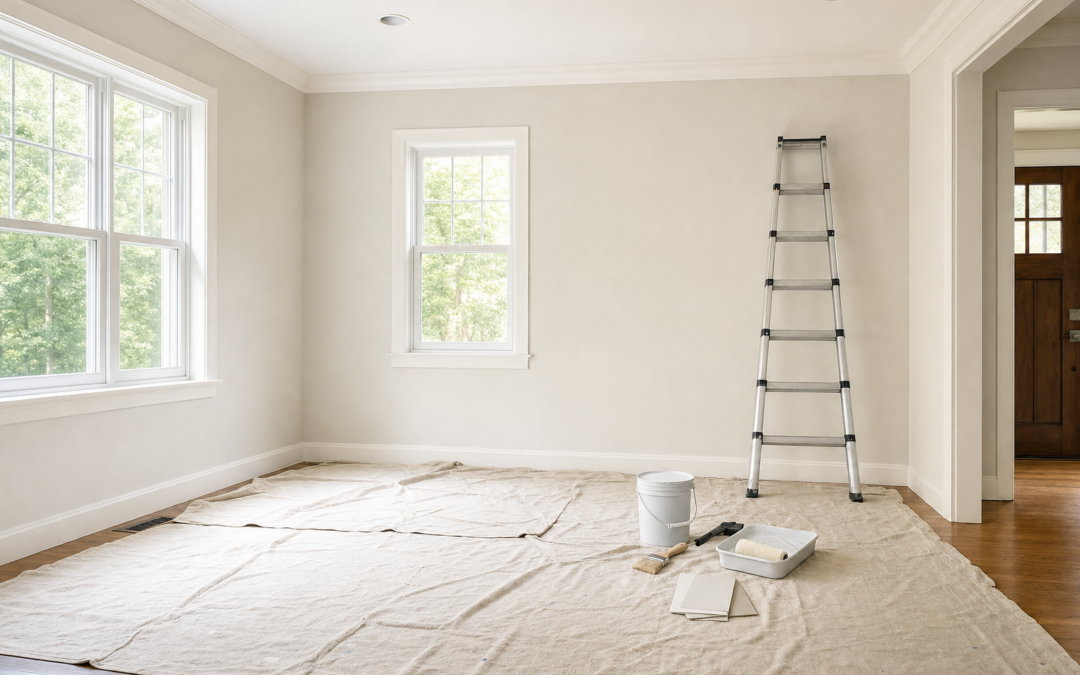
Painting a room goes smoothly when you follow a checklist instead of improvising mid-ladder. This DIY room painting checklist covers protection, ladders, cut-in, rolling, caulk touch-ups, and cleanup so you do not discover missed steps after furniture is back against wet baseboards.
Use it alongside product deep-dives in our Painting & Wall Prep hub. Print the sequence, then adapt to your room’s quirks.
Before Day One: Decisions That Save Time
Choose sheen and color with lighting in mind—test samples on multiple walls. Confirm whether ceilings and trim are in scope. Buy enough paint (measure square footage; add 10%). Schedule drying time between coats. Arrange help for moving heavy furniture.
Check weather and HVAC. Extreme humidity slows latex. Direct blasts from a vent can dry edges too fast and leave lap marks. Plan ventilation without turning the room into a dust tunnel.
Protection: Floors, Furniture, and Fixtures
Move furniture out or to the center and wrap it. Take down art and curtains. Remove outlet covers and bag the screws. Mask or remove hardware.
Cover floors with canvas drop cloths that stay put and absorb drips. Plastic alone becomes a slip rink and pools spills. Overlap seams and tape cloths at baseboards when needed.

Trimaco SuperTuff 10 oz thick Heavyweight Canvas Drop Cloth — A Trimaco SuperTuff heavyweight canvas drop cloth is the floor protection that survives a weekend of ladders and drips without shredding. Use plastic for furniture tops; keep canvas underfoot.
Ladder Safety Before Any Cutting-In
Use a ladder that fits the room height without forcing you to stand on the top cap. Keep three points of contact. Move the ladder instead of overreaching—overreach is how you paint your wrist and the wall with a streak.
Telescoping and multi-position ladders help in tight foyers and stair landings when used per ratings. Inspect feet and locks every time you set up.
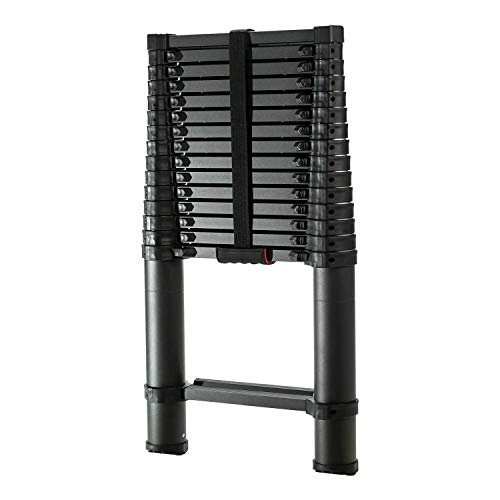
Xtend & Climb Contractor Series 155+/250 Telescoping ladder — An Xtend & Climb Contractor Series telescoping ladder packs down for storage and extends for high walls when you need compact transport between rooms. Mind the duty rating and lock indicators.

Little Giant Revolution Ladder — A Little Giant Revolution-style multi-position ladder adapts to stairs and uneven setups that defeat a straight stepladder. Take minutes to configure it correctly—speed comes from stability, not from guessing angles.
Prep Block (Do Not Skip)
- Clean walls
- Repair holes and cracks; sand smooth
- Caulk trim gaps
- Prime stains and bare patches
- Dust everything again
If prep is not done, stop painting and finish prep. Rolling over dust embeds grit forever.
Caulk Touch-Ups That Make Trim Look New
Run a continuous bead of paintable caulk along gaps where trim meets wall. Tool with a wet finger or caulk tool. Wipe excess. Let dry before painting. Flexible caulks handle seasonal movement better than rock-hard fillers on trim joints.

Sashco 10016 10.5oz 10016 Big Stretch Caulk 10.5-Ounce Cartridge — Sashco Big Stretch caulk is built for joints that move—useful on trim lines that crack ordinary caulk after a season. Paintability and elasticity are the points; tool it clean for a tight shadow line.

DAP Kwik Seal Kitchen & Bath Adhesive Caulk — DAP Kwik Seal kitchen and bath adhesive caulk suits damp-area trim and fixtures where moisture resistance matters. Use the right caulk in wet rooms instead of a general interior formula.
Cut-In Sequence
Cut in ceilings first if painting them, then wall-ceiling lines, then corners, then along trim. Work in sections you can roll before the cut-in dries. Maintain a wet edge between brushwork and roller.
Use an angled sash brush, light loads, and a steady stance on the ladder. Rushing cut-in is how ceiling paint gets a fuzzy gray halo.
Rolling Walls the Efficient Way
Load the roller evenly. Work in three- to four-foot widths from top toward mid-wall, then complete the lower half. Use a W or M pattern to distribute, then roll out evenly without heavy pressure. Overlap each pass. Keep the extension pole attached for consistent angle and pressure.
Second coats go on after the first is dry per the can. Inspect with raking light between coats for holidays.
Trim and Doors
Paint trim after walls if you like cutting a crisp wall edge against cured wall paint—or tape trim and paint walls last. For doors, remove if possible, paint flat, and watch drips on panel edges. Sand lightly between enamel coats when smoothness matters.
Mid-Project Quality Checks
- Are cut-in lines straight under raking light?
- Any roller lint or shed fibers?
- Did primer stains bleed through?
- Are inside corners fully covered?
- Is the floor cloth still catching drips, or did it migrate?
Fix issues between coats. After furniture returns, small holidays become big annoyances.
Cleanup Checklist
- Pull tape at the right time
- Wash brushes and covers (or wrap for overnight)
- Cap paint cans cleanly; label colors and rooms
- Remove drop cloths carefully—fold drips inward
- Reinstall plates and hardware
- Vacuum and return furniture only when surfaces are truly dry
Dispose of waste per local rules. Dry latex scraps differently than solvent waste. Do not pour leftover paint down drains.
Full-Day Timeline Example
Morning: Protect floors, final dust, cut in ceilings/walls.
Midday: Roll first coat; lunch during dry time; inspect.
Afternoon: Second coat; trim start if walls are set.
Evening: Pull tape, tidy tools, plan next-day trim finish if needed.
Large rooms or slow-drying conditions may need two days. That is better than forcing coats.
Common Room-Painting Failures
Starting without enough paint. Skipping primer on patches. Overreaching on ladders. Letting cut-in dry before rolling. Leaving tape for days. Moving furniture back onto soft baseboards. Storing brushes bent in a bucket.
Each failure is on the checklist above for a reason.
Minimal Tool List for One Room
- Drop cloths, tape, plastic
- Putty knife, spackle, caulk
- Angled brush, roller frame, covers, pole
- Safe ladder for the ceiling height
- Primer as needed, finish paint, tray liners
- Rags, lights, screwdriver for plates
If you lack a safe ladder or floor protection, acquire those before opening paint. Everything else fails open if you slip or drip on hardwood.
FAQ: Room Painting Checklist
How many coats?
Two finish coats are standard after proper priming. Deep color changes may need a gray-tint primer plus two coats.
Paint ceilings every time?
Not mandatory. Paint ceilings when stained, dingy, or part of a full refresh. Otherwise mask carefully and focus on walls.
When can I rehang curtains?
After paint is dry to the touch and not soft under light pressure—often overnight for latex, longer for humid rooms and enamels.
Should I wash new painted walls?
Wait for full cure (often weeks for scrubability claims). Then use gentle cleaners.
Next Steps
Run the checklist in order: protect, ladder safely, prep, caulk, cut in, roll, inspect, clean up. Compare the drop cloths, ladders, and caulks above so the boring gear is ready before the fun coats start.
Return to our Painting & Wall Prep hub for taping, brushes, and prep deep-dives. A room painted on a checklist looks intentional—and finishes on schedule.
Extra Practical Notes for DIY Room Painting Checklist: From Prep to Cleanup
Keep a dedicated “paint day” tote with screwdrivers for outlet plates, spare liners, rags, and a mini flashlight for closets. Staging tools reduces trips that track dust back onto wet edges. Photograph the room before you start so you remember furniture spacing and outlet locations when reassembly fatigue hits.
If you share tools across projects, label leftover paint cans with the room name, sheen, brand, and date. Future touch-ups fail when you cannot match a mystery beige from three years ago. Store cans away from freezing garages; frozen latex can ruin film formation even if it looks stir-able.
Finally, schedule buffer time. Rooms almost always need a second look the next morning under different light. A fifteen-minute holiday fix before furniture returns is cheaper than living with a missed spot behind the couch for a year.
Sample Testing That Prevents Regret
Paint large sample areas, not tiny swatches. View morning, afternoon, and night lighting. Check against flooring and fixed furniture. A color that looked calm on a chip can vibrate on a full wall. Decide before you buy five gallons.
Sheen samples matter too. Eggshell vs satin changes how imperfections read. Hallways with fingerprints may need scrubbable sheens; ceilings usually stay flat.
Electrical and Fixture Details
Kill power when removing tricky fixtures if you are not comfortable. Support heavy fixtures with a helper. Bag every screw set separately and label. Replacing a chandelier while paint is soft is how you leave fingerprints on fresh ceilings.
Cover smoke detectors carefully or follow manufacturer guidance—do not paint them, and do not leave them bagged after the job.
Kids, Pets, and Occupied Homes
Plan sleeping arrangements if bedrooms are in scope. Keep pets out of wet rooms; tails are efficient paintbrushes. Use odor strategies: water-based paints, ventilation, and running the HVAC only when mist has settled. Communicate dry times so housemates do not lean on door jambs.
If you must live in the space, paint one room at a time completely rather than opening every wall in the house at once.
Touch-Up Strategy After Move-In
Keep a small jar of each color. Dip a foam brush for nail holes later rather than dragging out a roller and creating a sheen patch. Touch up with feathered edges. For large repairs later, you may need to roll a full wall section to avoid flashing.
Store leftover paint with a tight lid and a plastic wrap gasket under the lid if you are fancy. Note the store tint code.
Stairwells and Two-Story Spaces
Stairwells need special ladder configurations or rented staging. Do not improvise with chairs on stairs. Cut in high points first while you are fresh. Roll with a pole from stable footing. Consider hiring for tall foyers if your ladder comfort is low—hospital visits cost more than painter labor.
Drop cloths on stairs must be secured. Slippery plastic on stairs is a hard no.
Final Walkthrough Script
With fresh eyes the next day, carry a wet edge brush and leftover paint. Check corners, behind door swings, switch edges, and baseboard tops. Look at walls from multiple angles. Fix now. Then return outlet plates, curtains, and furniture. Take a photo for your records and for future renovation planning.
A checklist is only as good as the final slow walk. Build that habit into every room.
Seasonal Timing and Indoor Climate
Paint and prep materials behave differently in midwinter dryness versus August humidity. In dry heated homes, paint can set too fast at edges and show lap marks—work in smaller sections and consider an additive designed for your paint brand. In humid weather, extend dry times between compound coats, primer, and finish. A moisture meter is overkill for most walls, but your hand and the clock are not: if compound feels cool and soft, wait.
Open windows when weather allows, but avoid gusts that blow grit onto tacky surfaces. Box fans pointed out a window can help, as long as they do not blast dust from a dirty filter onto wet paint. Turn off ceiling fans while coats are open; swirling air feels nice and creates stipple patterns you did not choose.
Store materials overnight in the same climate as the room. Paint that sat in a freezing car overnight can lose performance even after it seems thawed. Compound stored in a hot shed can dry in the tub. Treat chemistry gently and your finish looks expensive.
Documentation Habits for Future You
Write the date, brand, color name, sheen, and store tint code on the lid and on a piece of tape inside the linen closet. Snap a photo of the wet paint stickers. Future touch-ups and whole-room refreshes become trivial when you are not guessing which “agreeable beige” you used. Keep receipts for specialty primers too—matching a stain-blocking product matters when a leak scar returns.
If you share a home with others, leave a one-page note: which walls were primed, which caulk was used on baths, and which ladder setup worked for the stairwell. The next project starts faster when tribal knowledge is written down.
Mindset: Slow Is Smooth
Most DIY paint frustration comes from rushing the dull steps. Cleaning, sanding, masking, and dry times feel unproductive until you skip them and watch a finish fail. Build deliberate pauses into the plan. Use dry time to clean tools, refill ice water, and inspect with a work light. That rhythm produces better rooms than frantic rolling until midnight.
Measure success by even sheen, clean edges, and durability after a month of living—not by how fast the cans emptied. When neighbors ask who painted, you can say you did—and mean it as a compliment.
Tool Maintenance Between Coats
Wrap brushes and roller covers tightly in plastic wrap or sealable bags if you will resume within a day. For longer breaks, wash latex tools fully until the water runs clear, then reshape brush tips and let covers dry without crushing the nap. A hardened cover cannot be revived into a lint-free applicator. Keep a dedicated bucket and brush comb in your paint kit so cleanup is not improvised in the kitchen sink with a mess left behind.
Inspect extension pole threads and roller frame spring clips before each session. A loose pole that unscrews mid-ceiling pass leaves a commemorative streak. A few drops of light oil on metal threads once a season prevents freezing up in humid storage. Small maintenance habits keep the checklist moving when you would rather be painting than troubleshooting gear.
Light, Sightlines, and Final Judgment
Evaluate finish under the same lights you live with, then add a temporary work light at a sharp angle to catch holidays. Flat afternoon sun through a window can flatter a wall that evening lamps will criticize. Walk the room slowly after each coat. Mark misses with blue tape tabs so you do not lose them when you go mix paint. This inspection habit is faster than living with ghosts behind furniture for years.
If two coats still look uneven, ask whether the cause is porosity, color change, or application. More paint is not always the answer—sometimes another primer spot coat is. Diagnosing before flooding the wall with extra material saves money and drying time.