
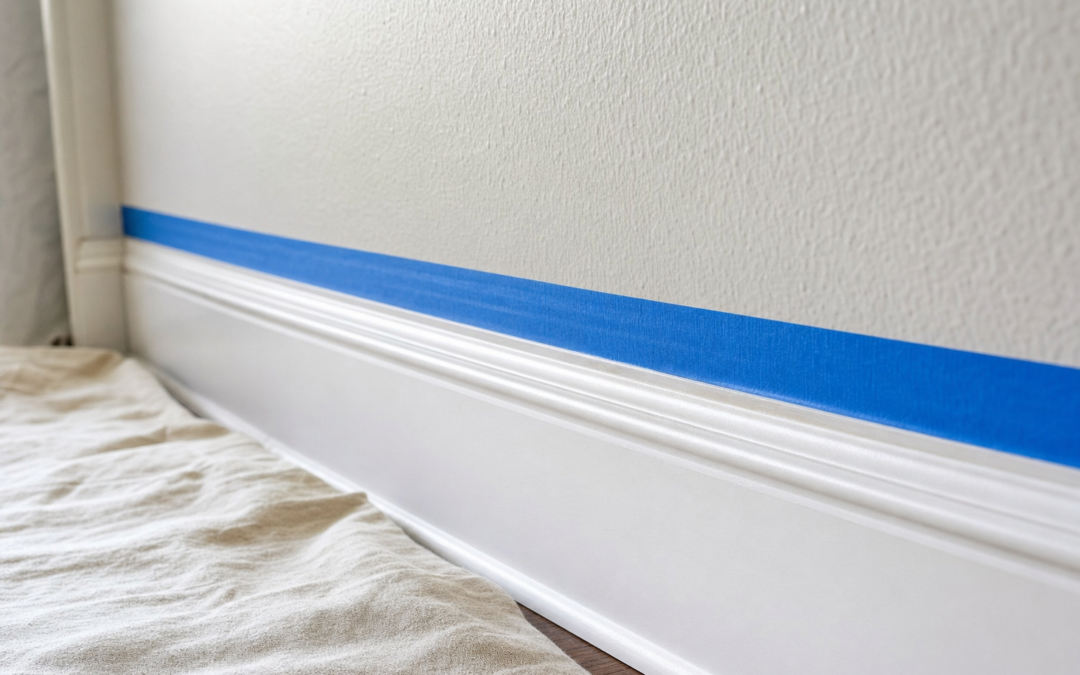
Clean paint lines are mostly tape discipline: the right tape, firm burnishing, and removal at the right time. This guide covers painter’s tape tips that stop bleed under trim and ceiling lines, plus when an edger pad helps and when it hurts.
For broader painting workflows, see our Painting & Wall Prep hub. Here we stay on edges—tape types, technique, and pull timing.
What Makes Paint Bleed Under Tape
Bleed happens when paint sneaks under a poorly sealed edge. Causes include dusty walls, textured surfaces, cheap tape that does not seal, loose application, and leaving tape until paint cures into a hard ridge.
Fix the causes in order: clean the surface, choose tape matched to the job, press the edge down, paint with a controlled brush load, and pull at the right time.
Tape Types: Multi-Surface, Delicate, and Outdoor
Multi-surface blue tape is the everyday wall-and-trim workhorse for most latex jobs. FrogTape-style paint-blocking tapes use polymer edges that gel with water-based paint to resist wicking. Delicate-surface tapes matter on freshly painted trim or wallpaper. Outdoor tapes handle sun and longer hangs.
Match tape to adhesion needs. Fresh paint (within a day or two) can lift with aggressive tape—use delicate formulas. Rough textures need careful burnishing; sometimes caulk sealing is better than hoping tape bridges peaks and valleys.

ScotchBlue Original Multi-Surface Painter’s Tape 2 Inch Wide — ScotchBlue Original multi-surface tape in a 2-inch width is a reliable daily driver for walls, baseboards, and general latex work. Burnish the edge and pull on schedule for crisp results.

FrogTape Multi-Surface Painter’s Tape with PAINTBLOCK — FrogTape multi-surface with PaintBlock is the pick when you want extra bleed resistance on clean, prepared edges—especially ceiling lines and color blocks where blue tape has disappointed you before.
Surface Prep for Tape That Actually Seals
Wipe dust from trim and wall junctions. Dust is a lubricant that prevents adhesion. On chalky walls, clean or seal first. Do not tape over wet primer.
Apply tape to fully dry surfaces. If you just washed baseboards, wait. Moisture under tape weakens the bond and invites bleed.
Application Technique: Straight, Tight, Burnished
- Align tape slowly; avoid stretching, which can rebound and lift
- Overlap short pieces on long runs rather than fighting one giant curl
- Burnish the paint-side edge with a putty knife wrapped in a microfiber cloth or a dedicated plastic burnisher
- Check corners twice—inside corners are where gaps hide
Burnishing is non-negotiable on ceilings and color separations. Finger pressure alone often leaves micro-channels.
The Optional Seal Coat Trick
For ultra-critical lines, after burnishing, brush a thin coat of the base color (or clear glaze) along the tape edge. Any seep seals with the old color, not the new. When dry, apply the new color. This pro trick turns tiny leaks invisible.
Alternatively, a whisper of paintable caulk tooled over the tape edge can seal texture—but wipe excess immediately and do not leave a visible caulk ridge.
Painting Against Tape Without Flooding It
Load the brush lightly near the tape. Push paint toward the line, not under it with a heavy scrubbing motion. Two light coats beat one heavy coat that pools against the edge.
Foam edger pads can speed long wall-ceiling lines for some painters, but they are not magic. Keep pads clean and replace when loaded with dried paint.

Shur Line Paint Edger Replacement Pads — Shur-Line edger replacement pads keep an edger tool working when the old pad is glazed with dried paint. Pair with tape on hard jobs; do not expect pads alone to replace careful cutting-in skill.
When to Pull Tape
The sweet spot is usually when paint is dry to the touch but not fully cured—often 30–90 minutes for latex, depending on conditions. Pull too early and you smear; pull days later and you risk tearing a paint skin.
Pull at a 45-degree angle back over itself, slowly. If a section starts to crack the film, score lightly along the tape edge with a sharp utility knife before continuing.
Hot, dry rooms accelerate skinning. Humid rooms stay wet longer. Adjust timing to conditions, not to a single rule from a message board.
FrogTape vs ScotchBlue: Practical Choosing
Choose ScotchBlue for standard multi-surface jobs and good technique. Choose FrogTape when you have had bleed issues, when cutting sharp accent walls, or when you want extra insurance on ceiling lines. Both fail on dirty texture if you skip burnishing. Neither fixes poor wall prep.
Width matters: 1.5–2 inch tape gives a safer mask on baseboards; narrow tape can work on fine trim but leaves less margin for error.
Ceilings, Baseboards, and Inside Corners
Ceiling lines: If the ceiling is already white and clean, many painters cut in freehand. If you tape, burnish hard and pull on time.
Baseboards: Tape the top edge if you are not confident freehanding. Paint walls before final trim touch-up coats when schedules allow.
Inside corners: Tape one wall at a time. Painting both sides of a corner wet invites transfer. Let one wall dry before masking the adjacent color.
Textured Walls and Orange Peel
Texture breaks tape seals. Burnish with a flexible knife that reaches into shallow valleys. For heavy knockdown, consider freehand cutting with a quality angled brush instead of trusting tape across peaks. Or seal the edge with the base-color trick.
Fresh Paint and Delicate Surfaces
Fresh trim paint can lift. Wait the manufacturer’s cure window or use delicate-surface tape with light adhesion. Always test in an inconspicuous spot. Pull sooner rather than later on fresh films.
Wallpaper, cured veneers, and unfinished wood need special caution. When unsure, cut in freehand with a steady angled sash brush.
Common Tape Mistakes
- Taping dusty baseboards
- Stretching tape around corners
- Skipping burnish on ceiling lines
- Flooding the edge with a overloaded brush
- Leaving tape on for a week “until we finish the closet”
- Reusing creased, contaminated tape
Replace tape that lost its tack. A ruined edge costs more time than a fresh strip.
Building an Edge Kit
Keep multi-surface tape, a paint-blocking tape, an angled sash brush, a burnishing tool, and optional edger pads. Add a sharp utility knife for scoring cured edges. That small kit covers nearly every residential line problem.
FAQ: Painter’s Tape
Should I tape or cut in freehand?
Freehand is faster once your brush control is solid. Tape helps beginners and protects delicate adjacent finishes. Many experienced painters tape ceilings in unfamiliar houses and freehand at home.
Why did paint peel when I removed tape?
Usually the new coat bonded to the tape and skinned over. Pull earlier next time, or score the edge. Also check that you did not use aggressive tape on fresh paint.
Can I paint over tape multiple coats?
Yes, but keep coats light. Heavy buildup creates a thicker bridge that tears when pulled.
Does width change adhesion?
Adhesion chemistry matters more than width, but wider tape is more forgiving for masking floors and glass.
Next Steps
Pick a multi-surface tape for daily work, keep a paint-blocking roll for critical lines, and practice burnish-and-pull timing on a closet before you tape the living room. Compare the tapes and edger pads above, then make clean edges part of your standard room checklist.
More techniques live in our Painting & Wall Prep hub. Crisp lines come from sealed edges and timely pulls—not from hoping the second coat behaves.
Extra Practical Notes for Painter’s Tape Tips for Clean Lines Every Time
Keep a dedicated “paint day” tote with screwdrivers for outlet plates, spare liners, rags, and a mini flashlight for closets. Staging tools reduces trips that track dust back onto wet edges. Photograph the room before you start so you remember furniture spacing and outlet locations when reassembly fatigue hits.
If you share tools across projects, label leftover paint cans with the room name, sheen, brand, and date. Future touch-ups fail when you cannot match a mystery beige from three years ago. Store cans away from freezing garages; frozen latex can ruin film formation even if it looks stir-able.
Finally, schedule buffer time. Rooms almost always need a second look the next morning under different light. A fifteen-minute holiday fix before furniture returns is cheaper than living with a missed spot behind the couch for a year.
Timing Tape Relative to Wall Dryness
Tape sticks best to clean, dry, cured surfaces. If you just painted trim yesterday with a high-adhesion tape today, you may lift finish. Flip the sequence when possible: finish walls, let them cure, then tape off walls to paint trim—or use delicate tape and short dwell times.
Read the tape’s rated removal window. Some outdoor tapes tolerate longer hangs; indoor multi-surface tapes often prefer days, not weeks.
Color Blocking and Accent Walls
Accent walls reward paint-blocking tapes and the seal-coat trick. Mark level lines with a laser or careful measuring; crooked accent edges bother the eye more than slightly imperfect whole-room cut-ins. Burnish twice along long horizontal lines.
When two saturated colors meet, do not skimp on coats. Thin coverage at the boundary looks like bleed even when tape worked.
Glass, Hardware, and Specialty Masking
Use tape designed for glass when masking windows, and pull before full cure to avoid adhesive haze. For hardware you cannot remove, mask carefully with precise pieces rather than wrapping giant blobs of tape that leave sticky residue.
On stair spindles, consider removing them if design allows; taping turned wood consumes time that spraying or careful brushwork might beat.
Humidity, Heat, and Adhesive Behavior
Heat can bake adhesive into delicate surfaces. High humidity can weaken tack. In a hot upstairs room in summer, work in shorter tape cycles: apply, paint, pull—do not tape the whole floor of the house in the morning and pull at midnight.
Store tape in a climate-controlled space. Garage-baked rolls lose consistent adhesion.
Teaching Freehand After Tape Training
Tape is a training wheel for brush control. After a few rooms, practice freehand cut-ins on closets. Load less paint, brace your pinky on the wall, and move your whole arm. Freehand skills reduce tape cost and speed future projects—but keep tape in the kit for guest rooms and tricky ceilings.
There is no prize for never using tape. There is a prize for clean lines by whatever method fits the day.
Residue Removal Without Damaging Paint
If adhesive remains, try gentle pressure with a plastic scraper and a bit of warm soapy water or a residue remover safe for cured paint. Test first. Aggressive solvents can soften fresh finish. Prevention—pulling on time—beats remediation.
Seasonal Timing and Indoor Climate
Paint and prep materials behave differently in midwinter dryness versus August humidity. In dry heated homes, paint can set too fast at edges and show lap marks—work in smaller sections and consider an additive designed for your paint brand. In humid weather, extend dry times between compound coats, primer, and finish. A moisture meter is overkill for most walls, but your hand and the clock are not: if compound feels cool and soft, wait.
Open windows when weather allows, but avoid gusts that blow grit onto tacky surfaces. Box fans pointed out a window can help, as long as they do not blast dust from a dirty filter onto wet paint. Turn off ceiling fans while coats are open; swirling air feels nice and creates stipple patterns you did not choose.
Store materials overnight in the same climate as the room. Paint that sat in a freezing car overnight can lose performance even after it seems thawed. Compound stored in a hot shed can dry in the tub. Treat chemistry gently and your finish looks expensive.
Documentation Habits for Future You
Write the date, brand, color name, sheen, and store tint code on the lid and on a piece of tape inside the linen closet. Snap a photo of the wet paint stickers. Future touch-ups and whole-room refreshes become trivial when you are not guessing which “agreeable beige” you used. Keep receipts for specialty primers too—matching a stain-blocking product matters when a leak scar returns.
If you share a home with others, leave a one-page note: which walls were primed, which caulk was used on baths, and which ladder setup worked for the stairwell. The next project starts faster when tribal knowledge is written down.
Mindset: Slow Is Smooth
Most DIY paint frustration comes from rushing the dull steps. Cleaning, sanding, masking, and dry times feel unproductive until you skip them and watch a finish fail. Build deliberate pauses into the plan. Use dry time to clean tools, refill ice water, and inspect with a work light. That rhythm produces better rooms than frantic rolling until midnight.
Measure success by even sheen, clean edges, and durability after a month of living—not by how fast the cans emptied. When neighbors ask who painted, you can say you did—and mean it as a compliment.
Tool Maintenance Between Coats
Wrap brushes and roller covers tightly in plastic wrap or sealable bags if you will resume within a day. For longer breaks, wash latex tools fully until the water runs clear, then reshape brush tips and let covers dry without crushing the nap. A hardened cover cannot be revived into a lint-free applicator. Keep a dedicated bucket and brush comb in your paint kit so cleanup is not improvised in the kitchen sink with a mess left behind.
Inspect extension pole threads and roller frame spring clips before each session. A loose pole that unscrews mid-ceiling pass leaves a commemorative streak. A few drops of light oil on metal threads once a season prevents freezing up in humid storage. Small maintenance habits keep the checklist moving when you would rather be painting than troubleshooting gear.
Light, Sightlines, and Final Judgment
Evaluate finish under the same lights you live with, then add a temporary work light at a sharp angle to catch holidays. Flat afternoon sun through a window can flatter a wall that evening lamps will criticize. Walk the room slowly after each coat. Mark misses with blue tape tabs so you do not lose them when you go mix paint. This inspection habit is faster than living with ghosts behind furniture for years.
If two coats still look uneven, ask whether the cause is porosity, color change, or application. More paint is not always the answer—sometimes another primer spot coat is. Diagnosing before flooding the wall with extra material saves money and drying time.