
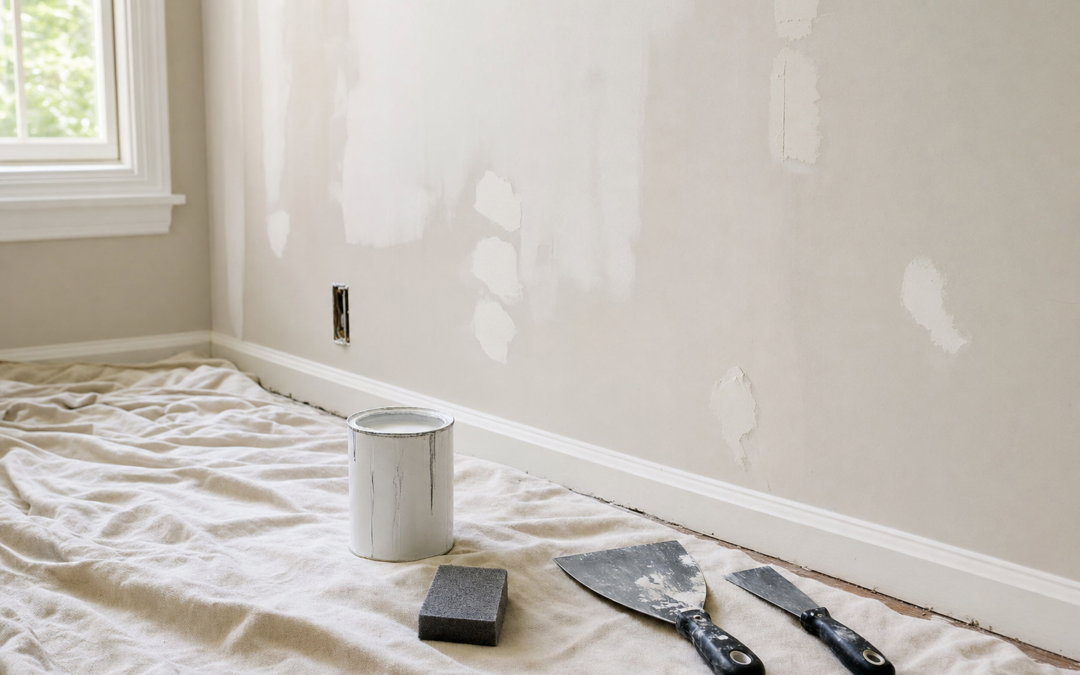
Most paint jobs fail before the first coat ever hits the wall. Peeling, flashing, visible patches, and fuzzy roller texture usually trace back to skipped prep—not cheap paint. This 2026 guide walks through a practical wall-prep checklist for DIYers who want smooth, durable results: clean, repair, sand, prime, then paint.
If you are planning a full room refresh, start from our Painting & Wall Prep hub. Below we stay on prep itself—tools, primers, and the mistakes that show up under afternoon light.
Why Prep Matters More Than the Paint Brand
Paint is a thin film. It cannot hide grease, chalky old latex, glossy enamel, or soft spackle that was never sanded. Light rakes across walls and ceilings, so every ridge and dust speck becomes a shadow. Good prep is not perfectionism for its own sake; it is how you stop redoing the same room in two years.
Translate that into a mindset:
- Clean first: dirt and kitchen film kill adhesion
- Repair second: fill holes and cracks so they stay filled
- Sand third: feather patches until your hand cannot find an edge
- Prime fourth: lock stains, seal repairs, and unify porosity
- Paint last: only after the wall feels uniformly dull and dust-free
Skip a step and you will still finish the room—you will just finish it again later.
Room Assessment Before You Open a Can
Walk the space with a bright work light held at a shallow angle. Mark every nail pop, hairline crack, water stain, and glossy patch with painter’s tape tabs. Note rooms with cooking grease, nicotine, or crayon: those need stronger cleaning and often oil or stain-blocking primer.
Check sheen of the existing finish. Flat paint sands and accepts new coats easily. Semi-gloss or oil enamel needs scuff sanding and a bonding primer. If walls feel chalky when you wipe them, they need a sealing primer before color.
Also plan protection: canvas drop cloths on floors, plastic on furniture you cannot move, and outlet covers removed rather than taped poorly. Prep is faster when the room is empty enough to move ladders without dodging chairs.
Cleaning: The Unsexy Step That Saves Finish
Vacuum baseboards and corners, then wash walls with a mild TSP substitute or a dedicated wall cleaner. Rinse with clean water and let dry fully. Kitchens need degreaser attention around the stove and above cabinets. Bathrooms need soap-scum removal and a check for soft drywall from old leaks.
Do not paint over mildew. Kill mildew with an appropriate cleaner, fix the moisture source, and prime with a stain blocker. Painting over active growth traps the problem under a fresh film until it returns.
After washing, wipe a white cloth across a few spots. If it still picks up gray or yellow film, wash again. Primer and paint stick to clean substrate—not to film.
Patching Holes, Cracks, and Nail Pops
For small nail holes, a lightweight spackle and a flexible putty knife are enough. Press compound in, overfill slightly, and sand flush when dry. For larger holes, use a patch kit or mesh and joint compound in thin layers. Thick single fills shrink and telegraph.
Nail pops need a fix, not just a smear. Drive a new drywall screw an inch above and below the pop into the stud, set the old nail, then mud. Cracks along seams often need paper or mesh tape plus compound, not a single knife swipe of caulk.
Caulk belongs at trim joints and hairline gaps where wood meets wall—not as a substitute for drywall compound on open holes. Use a paintable acrylic or elastomeric caulk designed for trim movement.

Warner Plastic Putty Knife Set — A plastic putty knife set covers most DIY fills without gouging soft drywall. Keep a stiff metal knife for scraping loose paint, and use plastic for spreading spackle where you want a soft edge.
Sanding Without Creating a Dust Storm
Sanding is how patches disappear. Use fine/medium drywall sponges for feathering and a pole sander for large compound areas. Vacuum between coats. Dust left on the wall becomes grit under primer.
Feel with a clean hand more than you stare. Eyes miss ridges that fingertips catch. If you feel a high spot, sand; if you feel a low dish, add another thin compound coat. Stop when the repair blends into the surrounding plane.

3M Drywall Sanding Sponge, Fine/Medium Grits, 2.75 in — A dual-grit drywall sanding sponge is the right middle tool for feathering patches and scuffing glossy paint before primer. Wet-sand lightly on finish coats when you want less airborne dust.
Scuff glossy enamel with 180–220 grit until the shine dulls. You are not stripping to bare drywall—just giving the next coat tooth. Wipe with a tack cloth or damp microfiber before priming.
Priming: When Color Alone Is Not Enough
Primer is not optional paint. Use it when you have:
- Fresh compound or bare drywall patches
- Stains from water, smoke, or markers
- A big sheen or color change (dark to light especially)
- Glossy or oil-based existing finishes
- Chalky or unknown old coatings
Oil-based stain blockers shine for tough water marks and smoke. Water-based bonding primers suit most latex-over-latex room flips. Spray primers help on furniture, cabinets, and small touch areas where brushing shows strokes.

Kilz Original Interior Oil-Based Primer/Sealer 1 Quart — Kilz Original oil-based primer/sealer is the classic stain-blocking pick for water marks, smoke, and patched areas that keep ghosting through latex. Ventilate well and plan cleanup with mineral spirits.
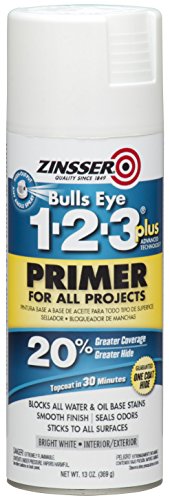
Zinsser Bulls Eye 1-2-3 Plus Spray Primer, White, 13oz — Zinsser Bulls Eye 1-2-3 Plus spray primer is handy for spot priming repairs, trim touch-ups, and small projects where a full gallon is overkill. Shake thoroughly and keep the can moving to avoid puddles.
Spot-prime patches even when the rest of the wall looks fine. Unprimed compound drinks paint differently and leaves dull “flash” spots. After primer dries, sand nibs lightly and vacuum again.
Common Prep Mistakes That Show Up Later
Painting dirty walls. Kitchen grease is invisible until the new coat peels in sheets. Wash.
Skipping sanding on patches. Soft ridges look fine wet and ugly dry. Feather every repair.
Caulking nail holes instead of filling. Caulk shrinks and stays soft; compound sands hard and flat.
Priming only “the bad spots” with no blend. Hard primer edges can flash. Feather primer onto surrounding paint.
Rushing dry times. Compound and primer need full cure windows. Recoating too soon traps moisture and weakens the film.
Ignoring sheen mismatch. Flat over semi-gloss without scuffing leads to early peeling around doors and trim.
Tool Kit for a One-Room Prep Day
You do not need a contractor van. A realistic kit includes:
- Plastic and metal putty knives in a few widths
- Lightweight spackle and a small tub of joint compound
- Drywall sanding sponges and a vacuum with brush attachment
- TSP substitute, sponges, and buckets
- Painter’s tape, drop cloths, and a quality primer matched to the problem
- LED work light for raking inspection
Buy compound in a size you will finish. Old opened tubs dry out and become lumpy. Keep knives clean—dried crumbs leave tracks in fresh mud.
Sequence Checklist You Can Print
- Empty or cover the room; remove outlet and switch plates
- Inspect with raking light; mark defects
- Clean walls top to bottom; rinse; dry
- Scrape loose paint; fix nail pops with screws
- Fill holes and tape cracks; dry; sand; repeat thin coats as needed
- Caulk trim gaps; tool smooth; dry
- Dust and vacuum thoroughly
- Prime stains and repairs (or full-room prime when changing drastically)
- Light sand primer nibs; dust again
- Only then cut in and roll finish coats
If you are short on time, cut luxury tasks—not cleaning, sanding, or priming stains. Those three decide whether the finish lasts.
Special Cases: Textures, Paneling, and Popcorn
Orange-peel and knockdown textures hide small flaws but still need cleaning and stain priming. Matching texture on patches takes practice—buy an aerosol texture can and practice on scrap cardboard before committing to a ceiling.
Wood paneling often needs a bonding primer designed for slick surfaces, plus filling grooves if you want a smooth modern look. Popcorn ceilings are a different project; if you are only painting walls, mask ceilings carefully so roller spray does not telegraph onto the texture.
How Much Primer and Compound to Buy
A quart of primer covers small stain work; a gallon covers a typical room when full-priming. Compound use varies wildly with repair count. Start with a small tub for nail holes and a larger box if you are skim-coating. Unused compound sealed tightly can survive a few weeks; leftover oil primer does not belong in a sealed living space without ventilation plans.
Budget time more carefully than money. A thorough prep day often takes longer than two finish coats. That is normal.
Quality Control Before You Call Prep Done
Do a final raking-light walk. Touch every patch. Look for shiny islands of old gloss, dusty corners, and tape residue. Confirm primer covered stains completely—if a mark still shows, spot-prime again rather than hoping finish paint will hide it.
Smell and moisture matter too. Walls should be dry to the touch with no cool damp spots. Painting damp drywall locks in trouble.
FAQ: Wall Prep Before Painting
Can I just use paint-and-primer-in-one?
Those products help on clean, sound walls with a mild color change. They do not replace stain blockers, bonding primers on glossy enamel, or proper patch priming. Use the right primer when the wall has a real problem.
Do I need to sand the entire room?
Not always. Sand repairs and scuff glossy areas. Flat, clean walls in good shape may only need washing and light dusting. When in doubt, a quick full-room scuff improves adhesion with little extra time.
Oil vs water-based primer?
Oil-based stain blockers still win on severe smoke and water stains. Water-based primers win on cleanup, odor, and most everyday latex repaints. Match the primer to the failure mode, not to habit.
How long should I wait after priming?
Follow the can. Many water-based primers recoat in one to three hours; oil primers often need longer. Cool, humid rooms slow everything. Rushing is how you get fingerprints and soft film.
Next Steps
Build your prep kit around knives, sanding sponges, cleaner, and a primer that matches your stains or sheen change. Work the sequence—clean, repair, sand, prime—before you open the finish color. Compare the tools above, then move into cutting in and rolling with a wall that is actually ready.
Explore more guides in our Painting & Wall Prep hub, and treat prep as the project that makes the paint look expensive. Smooth walls are built with patience and raking light, not with a second rushed coat.
Extra Practical Notes for How to Prep Walls Before Painting (2026 Guide)
Keep a dedicated “paint day” tote with screwdrivers for outlet plates, spare liners, rags, and a mini flashlight for closets. Staging tools reduces trips that track dust back onto wet edges. Photograph the room before you start so you remember furniture spacing and outlet locations when reassembly fatigue hits.
If you share tools across projects, label leftover paint cans with the room name, sheen, brand, and date. Future touch-ups fail when you cannot match a mystery beige from three years ago. Store cans away from freezing garages; frozen latex can ruin film formation even if it looks stir-able.
Finally, schedule buffer time. Rooms almost always need a second look the next morning under different light. A fifteen-minute holiday fix before furniture returns is cheaper than living with a missed spot behind the couch for a year.
Stain Diagnosis Before You Prime
Not every discoloration needs the same primer. Tan water rings after a roof leak often respond to oil-based stain blockers. Nicotine film may need washing plus a dedicated stain-blocking primer. Marker and crayon sometimes need shellac-based sealers. If a stain bleeds through the first primer coat, spot-prime again instead of stacking finish paint and hoping.
Photograph stains before you cover them. If a leak is active, painting is premature—fix plumbing or roofing first. Prep products hide history; they do not stop water.
Skim Coating vs Spot Patching
Spot patching fixes discrete holes. Skim coating levels waves, old texture, or widespread surface chatter. A full skim is a different project: thin coats of joint compound over large areas, careful sanding, and full priming. Most homeowners should not skim an entire living room on a first paint weekend unless they have practiced on a closet.
If walls are generally flat with a dozen nail holes, spot patch. If every raking light shows hills and valleys from old repairs, budget a skim or hire help. Knowing the difference prevents a weekend of frustration.
Dust Control Strategies That Actually Work
Close HVAC supplies or cover them. Use a shop vac with a brush attachment while sanding when possible. Consider a plastic zipper doorway if you are sanding heavily. Wipe sills and baseboards after sanding—dust settles horizontally and ends up in your roller nap.
Wear a dust mask rated for fine particles. Drywall dust is not a joke for lungs or for the finish quality of the paint that follows.
Ordering Supplies So You Do Not Mid-Project Stall
Buy cleaner, compound, knives, sponges, primer, tape, and drop cloths before you open walls. Mid-project store runs track dirt back into the room and break your rhythm. Keep spare sandpaper grits and an extra putty knife; tools disappear under drop cloths at the worst moment.
If you are priming at night, confirm you have adequate lighting. Dim rooms hide ridges that morning sun will advertise.
When to Call a Pro for Prep
Call help for extensive water damage, mold remediation, lead-paint concerns in older homes, or full-room skim work you do not have time to learn. DIY prep is excellent for ordinary holes and scuffs. It is a poor place to experiment with hazardous coatings or structural moisture problems.
Lead-safe practices matter on pre-1978 homes. If you suspect lead paint, follow EPA guidelines or hire certified renovators rather than dry-sanding blindly.