
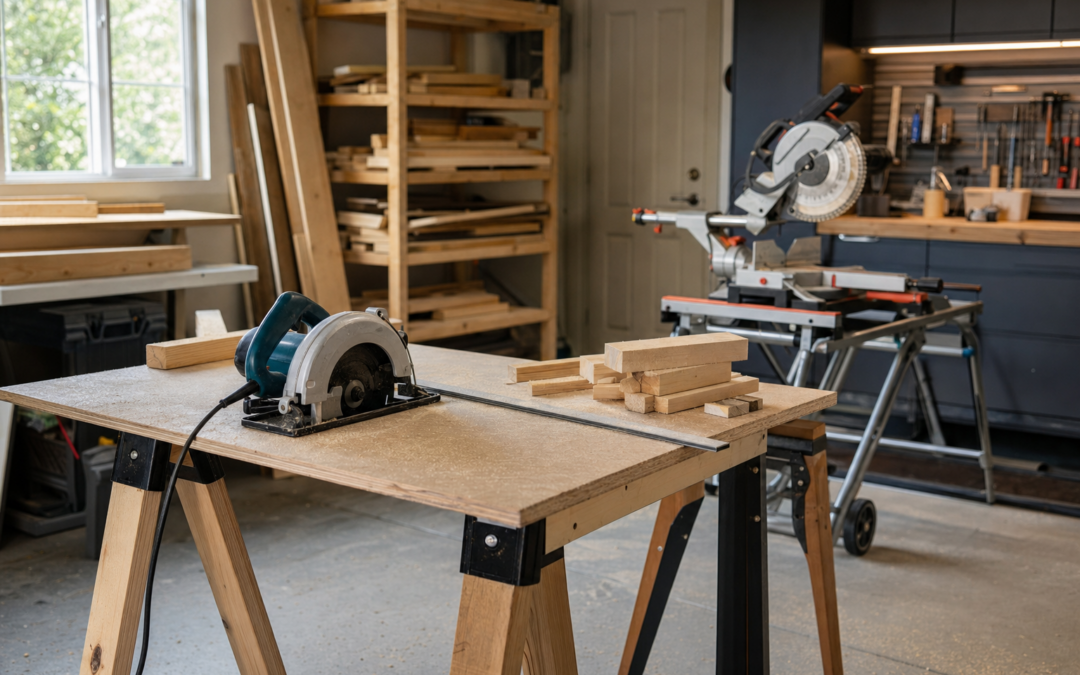
Homeowners often buy “a saw” the way they buy “a drill”—as if one motor covers every cut. Circular saws and miter saws overlap, but they solve different problems. One shines at breaking down sheet goods and making long rips and rough crosscuts on site. The other owns repeatable trim angles and clean crosscuts on a dedicated fence. This 2026 guide explains which cut tool you need first, when owning both pays off, and how stands and rails upgrade either choice.
For more tools beyond saws, visit our Power Tools hub. Here we stay on circular vs miter decisions for decking, trim, and DIY builds.
Circular Saw: Mobile Cutting for Sheets and Rough Work
A circular saw is a handheld blade on a shoe that rides the work. With a straightedge or track, it breaks down plywood and OSB that will not fit on a miter saw. On a deck, it crosscuts boards in place. With care, it can bevel and plunge. It is the saw you take to the material when the material will not come to a station.
- Best at: sheet goods, long boards, jobsite flexibility, bevel cuts on wide panels
- Weaker at: dozens of identical trim angles without jigs, tiny precise stop cuts for picture-frame joinery
- Needs: sharp blade, support for sheet goods, respect for kickback and cord/battery planning
Blade choice matters as much as brand. A framing blade chews through 2x stock quickly; a higher-tooth plywood or finish blade reduces tear-out on visible panels. Swapping blades is cheaper than buying a second saw for one project.
Miter Saw: Stationary Accuracy for Trim and Crosscuts
A miter saw pivots and often bevels on a fixed base with a fence. You bring cut lengths to the saw, set an angle, and repeat. Baseboards, door casings, craft boards, and deck rail parts love that workflow. Sliding models increase crosscut capacity for wider boards; dual-bevel designs flip angles without turning stock around.
- Best at: trim carpentry angles, repeatable crosscuts, compound miters
- Weaker at: full-sheet plywood breakdown, long rips, cutting in place on installed boards
- Needs: stable stand or bench, infeed/outfeed support, dust plan
Capacity numbers on the box assume specific orientations. Confirm the widest board you actually cut at 90° and at common miters before you fall in love with a compact 10-inch non-slider.
Which Should You Buy First?
Buy a circular saw first if your near-term projects include plywood furniture, shed floors, wall sheathing scraps, or deck boards you will cut on sawhorses. Buy a miter saw first if you are deep in trim, frames, and repeated crosscuts of dimensional lumber on a bench.
Many DIY households eventually own both: circular for sheets and rough work, miter for finish lengths. If budget allows only one this year, match the tool to the next three projects—not to a fantasy workshop.
Corded vs Cordless Circular Saws
Corded circular saws deliver continuous power for long sheet-cutting sessions and usually cost less per amp of cutting ability. Cordless models win when you are on a roof-adjacent deck, in the yard, or moving around a house where cords are trip hazards. If you already own an 18V/20V platform, a cordless circular saw can be the second or third tool that justifies the batteries you bought with a drill kit.
Runtime depends on blade sharpness, wood density, and pack amp-hours. Keep a sharp blade; a dull cordless saw feels “underpowered” when the real problem is friction heat.
Miter Saw Stands and Workflow Upgrades
A great miter saw on a wobbly countertop still produces bad trim. Stands with wheels let you roll the saw into the driveway for dusty work and back into a corner for parking. Support wings keep long baseboard from tipping mid-cut. Even a solid pair of sawhorses with a sacrificial top is better than cutting across knee-held stock.
Dust collection is imperfect on most consumer miter saws, but a shop vac on the port plus a cut-off zone outdoors or on a tarp keeps the garage livable. Plan where offcuts fall so you are not standing on a rake of sharp triangles.
Product Callouts: Saws and a Stand We Review
Compare corded circular options, a cordless circular for platform users, miter saws for trim capacity, and a mobile stand that makes a miter station practical in a two-car garage.

Makita 5007F 7-1/4″ Circular Saw — A corded 7-1/4″ workhorse circular saw for sheet goods and rough cuts when you want continuous power without watching a battery gauge mid-panel.

Skil 5080-01 13-Amp 7-1/4″ Circular Saw, Red — Budget-friendly 13-amp circular saw for homeowners who need clean plywood and 2x cuts without stepping into premium cordless pricing yet.

DEWALT 20V MAX XR Brushless Cordless 7-1/4 in. Circular Saw — Brushless cordless 7-1/4″ circular saw for DEWALT 20V users who want deck boards and sheet cuts without dragging cords across the yard.

DEWALT Miter Saw — A DEWALT miter saw option aimed at trim and crosscuts when square, repeatable angles matter more than ripping full sheets.

Metabo HPT 12-Inch Dual Bevel Sliding Miter Saw, C12RSH3 — 12-inch dual-bevel sliding capacity for wider stock and compound angles—strong when crown, base, and deck railing cuts need reach.

BORA Portacube Miter Saw Stand with Wheels — Mobile stand with wheels that turns a miter saw into a roll-out station—valuable in shared garages where floor space returns to parking nightly.
Project Matchups
Building a deck
Circular saw for board ends and notches in place; miter saw (if you have one) for clean railing parts and repeated square cuts at a station. Many deck builders live primarily on a circular saw and speed square.
Install baseboard and casing
Miter saw first. A circular saw can cut trim with a guide, but angle repeatability suffers. Cope joints and scarfs still need patience either way.
Plywood cabinets or built-ins
Circular saw with a guide rail or clamped straightedge for sheet breakdown. Miter saw only for face-frame parts and trim, not full panels.
Kids’ projects and craft boards
Miter saw (with strict safety rules and adult control) for repeatable small stock. Circular saws are harder for tiny pieces—use a bench and push methods appropriate to the tool, or hand tools for micro work.
Safety Non-Negotiables
- Eye and ear protection; dust mask for sheet goods
- Support the work so the kerf does not pinch the blade
- Wait for the blade to stop before lifting a circular saw mid-cut
- Keep hands outside the miter saw’s marked danger zones; use clamps for small offcuts
- Unplug or remove battery when changing blades
- Never disable guards because they “get in the way”
Kickback on circular saws happens when the blade binds. Sharp blades, proper support, and not twisting mid-cut prevent most events. If the saw fights you, stop and reset—do not muscle through.
Blades, Bevels, and Measuring Habits
Square cuts start with square marks. A speed square and consistent “measure twice” habit beat upgrading the saw. For miters, cut test angles on scrap and dry-fit corners before touching paint-grade stock.
Bevel capacity is useful for shadow lines and compound trim, but many homeowner projects live at 90° and 45°. Do not pay for dual-bevel sliders unless your trim list justifies the capacity and complexity.
Budget Path That Avoids Regret
- Buy the saw that matches your next project type (circular for sheets/decks, miter for trim)
- Add a quality blade and real work support the same week
- Add the second saw type when you feel the first fighting the wrong job
- Add a rolling stand when the miter saw becomes weekly furniture
Skipping support and blades to afford a fancier saw is a common mistake. A mid saw with a sharp blade on a stable surface outperforms a premium saw used on the ground with a dull framing blade.
When Owning Both Pays Off
You will feel the payoff the first time you break down plywood with the circular saw in the morning and cut clean trim lengths on the miter saw in the afternoon—without forcing either tool into the other’s job. That split also reduces blade changes and setup friction. If your garage only has room for one station, keep the miter saw on a rolling stand and hang the circular saw on a wall hook with its blade cover intact.
Track and guide accessories for circular saws narrow the quality gap on long panel cuts. They do not turn a circular saw into a miter saw for nested trim angles, but they do make cabinet-side panels more predictable.
Layout Geometry: Why the Wrong Saw Feels “Inaccurate”
People blame saws for crooked cuts when the real culprit is unsupported sheet goods sagging into the blade or a miter saw fence that was never checked against a reliable square. Before upgrading motors, verify: Is the shoe flat? Is the blade true and sharp? Does the miter scale match a known 90° test on scrap? Is the workpiece fully supported on both sides of the kerf?
For circular saws, a clamped straightedge transforms results on plywood. Factory edges of sheets are not always trustworthy references after transport damage—measure from a marked line. For miter saws, build or buy stop blocks for repeated lengths instead of re-measuring every stud cut with a floppy tape.
Kerf width matters when you are fitting tight trim. Cut on the waste side of the line consistently. If you cut down the middle of a pencil line on finish work, parts shrink mysteriously and gaps appear that no caulk should have to hide.
Jobsite vs Garage Station Mentality
Circular saws thrive in jobsite mentality: carry the tool to the work, cut, move on. Miter saws thrive in station mentality: set up once, bring parts to the blade, stack finished lengths. Garages that try to force a miter saw into jobsite chaos without a stand end up cutting on the floor—which is how inaccurate and unsafe habits form.
If your garage must park cars nightly, prioritize a rolling miter stand or accept that the circular saw will handle more of your cutting until you have a dedicated corner. Do not leave a miter saw perched on a flimsy folding table in the dark where someone can bump it.
Material-Specific Notes
Pressure-treated lumber: heavier, wetter, harder on blades. Expect more effort and clean the saw afterward; corrosive residues are unfriendly to metal surfaces.
Plywood and melamine: tear-out loves the exit side of the cut. Use higher-tooth blades, score lines, or painter’s tape strategies, and support the panel fully.
Hardwood trim: sharp finish blades and slower feed. Let the miter saw reach full speed before entering the wood.
Aluminum and plastics: only with appropriate blades and techniques; many homeowner blades are wood-only. Read blade packaging.
Dust, Noise, and Neighbor Diplomacy
Saws are loud. Schedule cutting when it will not alienate neighbors or nap schedules. Eye and ear protection are mandatory, not optional accessories for “serious” cuts only. Dust from sheet goods includes binders you do not want as a daily breathing habit—cut outdoors when practical and use extraction when indoors.
Keep pets and kids out of the cut zone with a physical barrier, not a verbal hope. Offcuts are sharp and tempting as toys. A bin for scrap that empties weekly prevents ankle-cutting piles.
Upgrade Path After the First Saw
After you own one primary saw, upgrades that pay off faster than a second brand-new saw include: better blades, a reliable straightedge or track, outfeed supports, a rolling stand, and a dedicated cutting PPE kit hanging on the same hook as the saw. When you do buy the second saw type, you will already know which capacities you lacked—wider crosscuts, sheet breakdown, or bevel frequency—so the second purchase is targeted instead of speculative.
Field Notes From Real Garage Constraints
Real garages are cold in winter, hot in summer, and short on outlets. Plan extension cords rated for the tool load, keep cords out of blade paths, and do not run undersized cords that starve motors. Seasonal humidity warps lumber stored on concrete—sticker your boards and let them acclimate before critical cuts or finish sanding.
Lighting changes perceived quality. Add a bright shop light before you blame tools for wandering holes or missed layout lines. A $30 lighting improvement often upgrades every tool you already own. Keep a broom and vac habit so sawdust does not turn into a slip plane under a miter stand.
When storage is tight, vertical holsters and wall hooks beat floor piles. A charged battery on a known shelf is a project multiplier; a buried kit under holiday bins is how DIY weekends die. Revisit your layout each season as projects change—deck season wants different access than interior paint season.
Finally, write down what you bought and why. Six months later you will forget which battery platform you chose and why the corded sander was intentional. A simple note in your phone prevents duplicate purchases when a flashy kit goes on sale in a competing chemistry.
FAQ: Circular vs Miter Saws
Can a circular saw replace a miter saw?
For rough carpentry, often yes. For finish trim with many angles, a miter saw is faster and more consistent.
Can a miter saw cut plywood sheets?
Not practically as full sheets. You can cut smaller plywood parts within capacity, but sheet breakdown belongs to a circular saw (or table saw).
Do I need a sliding miter saw?
Buy a slider if you regularly crosscut boards wider than a non-slider can handle. Otherwise a quality non-slider is simpler and often stiffer.
Corded or cordless circular?
Corded for long panel sessions on a budget; cordless for mobility and platform synergy.
What size blade for homeowners?
7-1/4″ circular is the standard. Miter saws commonly land at 10″ or 12″—choose based on capacity needs, not prestige.
Next Steps
List your next three projects. If sheets or deck boards dominate, start circular. If trim angles dominate, start miter. Then compare the reviewed tools and stand above, and keep safety support in the same cart as the saw.
Explore more cutting and drilling tools in our Power Tools hub. The right saw is the one that matches how you cut—not the one that merely looks busiest on a garage poster.