
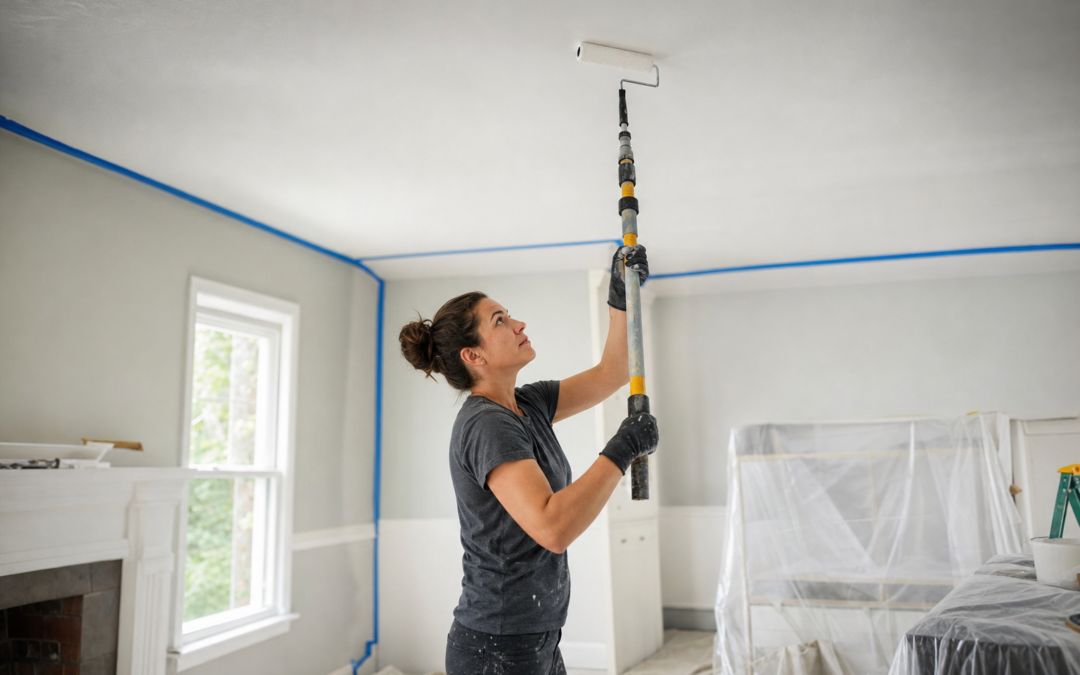
Painting ceilings is one of the most physically demanding DIY projects in home improvement. Unlike painting walls, working overhead strains your neck, shoulders, and arms, while the risk of visible roller marks is much higher due to lighting and angle. But with the right prep, technique, and tools, you can achieve a flawless ceiling finish—without the pain or unsightly streaks.
This guide is focused on ceiling-specific painting methods, assuming your walls and floors are already protected. Whether you’re refreshing a dingy ceiling or repairing water stains, you’ll learn how to avoid roller marks, minimize fatigue, and get professional results. We’ll also point you to some practical ceiling-painting tools and resources to help you work smarter, not harder.
Understanding Why Ceiling Painting Is Different
Ceiling painting brings a set of challenges that walls don’t. First, you’re working against gravity: paint can drip, and fatigue sets in faster as you work overhead. Second, natural and artificial lighting tends to highlight imperfections and roller marks on flat surfaces above eye level. Even minor inconsistencies stand out more dramatically on a ceiling than on your walls.
The texture and porosity of ceilings can also differ from walls. Many ceilings have a popcorn or knockdown texture, which needs a specific approach compared to smooth drywall. Proper planning, tool selection, and painting technique are critical to minimize common issues like lap marks, shadowing, and neck strain.
Essential Tools for Painting Ceilings
Before you start, assemble your tools and materials. Having the right gear makes a world of difference for ceiling projects. Here are the essentials:
- High-quality roller frame and covers: Choose a roller with the correct nap for your ceiling texture. Thicker nap (3/8″ to 3/4″) for textured surfaces, thinner (1/4″ to 3/8″) for smooth ceilings.
- Extension pole: A sturdy, adjustable pole allows you to paint overhead while standing on the floor, reducing fatigue and risk of falls.
- Paint edger or trim brush: For crisp lines where the ceiling meets the wall.
- Ceiling-specific paint: Look for spatter-resistant, flat/matte finish paint designed for ceilings. These paints hide imperfections and dry quickly.
- Drop cloths and plastic sheeting: Cover floors and furniture thoroughly.
- Painters tape: Protect wall edges and fixtures.
- Ladder: Only for edge work or hard-to-reach areas; minimize use to reduce neck strain.
Ready to upgrade your painting kit? Explore the best ceiling painting tools and wall prep supplies for more recommendations.

ROBERTS 5 In. Carpet Seam Roller Review — Practical paint rollers from ROBERTS, summarized from hub features and listed measurements. Key figures include 5 in, 10, 1.
Room Preparation: Protect Walls, Floors, and Fixtures
Even if your walls are already finished, proper prep is crucial before painting the ceiling. Take these steps to avoid splatters and headaches:
- Move furniture out, or group it in the center: Cover completely with plastic sheeting or canvas drop cloths.
- Cover the floor: Use a heavy-duty drop cloth to catch drips and spills. Plastic works but can be slippery; canvas is safer underfoot.
- Mask wall edges: Apply painters tape where the ceiling meets the walls. Press firmly to prevent paint bleed. If your wall paint is fresh, use delicate-surface tape.
- Protect fixtures: Remove or wrap light fixtures, smoke detectors, and ceiling fans with plastic and tape.
- Ventilate: Open windows or run fans to speed up drying and reduce fumes.
Good prep minimizes cleanup time and ensures sharp lines at the ceiling-wall junction.
Choosing the Right Roller and Extension Pole
The roller and extension pole you choose will directly impact your results—and your comfort. For ceilings, a lightweight but sturdy extension pole is essential. It allows you to reach the entire ceiling from the floor, reducing neck and shoulder strain and improving your leverage for even coverage.
Look for these features in a ceiling painting roller and pole:
- Locking, telescoping extension pole: Adjusts to your ceiling height and stays secure without wobbling.
- Quality roller frame: A smooth-rolling frame prevents streaks and roller marks.
- Roller cover nap: Use 3/8″ nap for smooth ceilings, 1/2″ for light texture, and up to 3/4″ for popcorn or heavy texture. Synthetic covers are best for latex paint.
Consider a roller frame with a quick-release mechanism for easier cleanup and changing covers mid-project.

Wooster Brush R017-9 Sherlock Roller Frame, 9-Inch ( ) Review — A Wooster pick in Paint Roller Frames that focuses on real-world usability Key figures include 2, 9 inch, 9.
How to Cut In Without Neck Pain or Mess
Cutting in—the process of painting a neat line where the ceiling meets the wall—is often the most tedious part. Many DIYers dread this step because it typically means balancing on a ladder and craning your neck. Here’s how to make it easier and safer:
- Use an edger tool: Paint edgers allow you to cut in cleanly from the floor, especially with an extension pole attachment. Choose a model with a shield to keep paint off the walls.
- Opt for angled brushes: If you prefer a brush, select a 2-2.5″ angled sash brush for control. Work in short sections and feather the paint away from the wall for a blended edge.
- Keep your head and neck neutral: Stand directly under the area you’re painting and look up only as much as necessary. Take frequent breaks to stretch your neck and shoulders.
- Don’t overload the brush or edger: Excess paint leads to drips and uneven lines.
For large rooms, you may want to cut in as you go, working in sections to maintain a wet edge and reduce lap marks.

Shur Line Paint Edger Replacement Pads Review — Practical paint rollers from SHUR-LINE, summarized from hub features and listed measurements. Key figures include 2001046, 1 , 0.63 .
Mixing and Loading Paint for Even Coverage
Ceiling paint consistency is crucial for a streak-free finish. Always stir your paint thoroughly before starting and mix multiple cans together (boxing) if you need more than one gallon for color consistency.
When loading your roller:
- Use a paint tray or bucket with a grid: This ensures even loading and removes excess paint.
- Don’t overload the roller: Too much paint causes drips and roller marks. Aim for a roller that’s saturated but not dripping.
- Roll off any excess: After loading, roll the roller along the grid or tray ramp to remove surplus paint.
Tip: If using specialty ceiling paint, follow the manufacturer’s directions for stirring and application. Some ceiling paints go on pink or blue and dry white, making it easy to track coverage.
Rolling Technique: How to Avoid Roller Marks
Roller marks (sometimes called “lap marks” or “streaks”) are the most common problem when painting ceilings. They occur when wet and dry paint overlap, or when paint is applied unevenly. Here’s how to avoid them:
- Work in sections: Paint a 3-4 foot square area at a time, blending each new section into the previous while the paint is still wet.
- Maintain a wet edge: Don’t let the paint dry between sections. Always roll into the wet paint from the previous area.
- Roll in one direction for the final pass: For your last stroke, always roll in the same direction (towards the window or main light source) for a uniform finish.
- Don’t press too hard: Let the roller do the work. Excess pressure causes uneven coverage and streaks.
- Reload your roller frequently: A dry roller leaves lap marks and uneven texture.
- Use overlapping strokes: Each pass should overlap the previous by about 50% to blend the paint.
If you see roller marks starting to form, lightly reroll the area with a near-dry roller before it dries completely.

Shur-Line Extension Pole 30 ” Review — A SHUR-LINE pick in Paint Roller Extension Poles that focuses on real-world usability Key figures include 30, 5.4 , 4.5 pounds.
Reducing Neck and Shoulder Strain
Ceiling painting is notorious for causing neck, shoulder, and upper back pain—especially if you use a ladder or work overhead for long periods. Here are practical tips to minimize discomfort:
- Use an extension pole: Painting from the floor with a pole allows you to keep your head and neck in a more neutral, comfortable position.
- Take frequent breaks: Every 15-20 minutes, stop and gently stretch your neck, shoulders, and arms.
- Switch arms: Alternate hands and change your stance to distribute muscle fatigue.
- Keep your work close: Don’t overreach or extend your arms above shoulder height more than necessary.
- Set up your work area for efficiency: Arrange your paint tray, roller, and supplies so you don’t have to bend or twist repeatedly.
If you start to feel strain, stop and rest. Rushing through ceiling painting only leads to mistakes and potential injury.
Dealing with Textured Ceilings: Popcorn, Knockdown, and More
Painting textured ceilings requires a slightly different approach. Popcorn, knockdown, and other textured finishes need a thicker roller nap and may require more paint for full coverage. Here’s how to handle them:
- Choose a 1/2″ to 3/4″ nap roller: This allows the roller to reach into the crevices and cover the texture evenly.
- Roll gently: Too much pressure can flatten or damage the texture, especially if it’s old.
- Test a small area first: Some textured finishes can soften or detach with moisture from the paint. If you notice flaking, consider sealing the ceiling with a primer first.
- Use ceiling-specific paint: These paints are thicker, spatter-resistant, and better at hiding imperfections in texture.
For heavily textured ceilings, two coats may be necessary for uniform color and coverage.
Troubleshooting Common Ceiling Painting Problems
Even with careful prep and technique, ceiling painting can introduce some challenges. Here’s how to troubleshoot the most common issues:
- Roller marks or lap marks: Usually caused by letting paint dry between sections. Work quickly and maintain a wet edge. If marks are visible after drying, a second coat (applied with proper technique) can help blend them out.
- Drips and spatter: Overloading the roller or moving too quickly causes drips. Roll off excess paint and use slow, steady strokes.
- Uneven color or sheen: Can result from poor mixing or using different paint batches. Always “box” paint cans together for color consistency.
- Paint on walls or fixtures: Protect with tape and plastic sheeting. Use an edger for clean lines and wipe away mistakes with a damp cloth while the paint is wet.
Remember, most ceiling painting problems are fixable with a little patience and the right approach.
When and How to Apply a Second Coat
Many ceilings benefit from two coats of paint, especially if you’re covering stains, painting over a darker color, or working with textured surfaces. Here’s how to do it right:
- Allow the first coat to dry fully: Check the paint can for recommended drying times—usually 2-4 hours for latex ceiling paint.
- Inspect for coverage: Use a bright light to check for thin spots, roller marks, or missed areas.
- Repeat the same technique: Cut in again if necessary, then roll in sections, maintaining a wet edge.
- Roll in the opposite direction: For best coverage, roll your second coat perpendicular to your first (e.g., first coat north-south, second east-west).
Let the final coat dry completely before removing tape and moving furniture back into place.
Cleanup and Final Touches
Once your ceiling is painted and dry, proper cleanup ensures your tools last longer and your room looks sharp:
- Remove painters tape slowly: Pull at a 45-degree angle while the paint is still slightly tacky for the cleanest edge.
- Clean rollers, brushes, and trays: Use warm soapy water for latex paint or mineral spirits for oil-based paint. Store tools upright to maintain their shape.
- Touch up edges: If needed, use a small brush to fix any missed spots or imperfections at the edges.
- Reinstall fixtures: Once the ceiling is fully dry, remove protective coverings and reinstall lights, fans, and smoke detectors.
Dispose of drop cloths and empty paint cans according to local regulations. Enjoy your refreshed, streak-free ceiling!
Key Takeaways and Next Steps
Painting ceilings doesn’t have to be a back-breaking, messy chore. With the right tools—especially a quality extension pole and roller frame—plus careful prep, you can achieve a flawless finish and avoid common pitfalls like roller marks and neck pain. Remember to work in sections, maintain a wet edge, and take frequent breaks to protect your body.
For more ceiling painting tips, product recommendations, and wall prep advice, visit our main hub for painting and wall prep resources.
With a methodical approach, your next ceiling project can be efficient, comfortable, and remarkably professional-looking.
Ceiling Painting Checklist: Everything to Do Before You Start
- Inspect the ceiling: Check for cracks, stains, peeling paint, or mildew. Address repairs before painting.
- Gather all supplies: Make sure you have paint, rollers, extension poles, brushes, tape, drop cloths, and a step ladder if needed.
- Remove or cover furniture: Move items out or pile them in the center of the room, then cover them securely.
- Protect floors and walls: Lay down drop cloths and tape off the edges where walls meet the ceiling.
- Turn off ceiling fans and lights: Remove blades or bulbs if possible, and cover fixtures with plastic.
- Clean the ceiling: Dust and wipe down the surface to ensure paint adheres properly.
- Prime if necessary: Use primer on stained, patched, or water-damaged areas for a uniform finish.
- Ventilate the room: Open windows or use fans to improve air flow and speed up drying.
- Wear protective gear: Use safety glasses, a hat, and a mask if working with textured or older (pre-1978) ceilings.
Following this checklist helps you avoid last-minute surprises and ensures a smoother painting process from start to finish.
Common Ceiling Painting Mistakes and How to Avoid Them
- Overloading the roller: Excess paint causes drips and splatters. Always roll off excess in the tray before heading to the ceiling.
- Not maintaining a wet edge: Working too slowly or in random patches leads to lap marks. Work in sections and overlap each pass while the paint is still wet.
- Using the wrong roller nap: A nap that’s too short for a textured ceiling won’t reach into crevices, while one that’s too thick for a smooth surface leaves stipple marks.
- Skipping primer on repairs: Joint compound or patched areas will flash through if not primed, creating visible dull spots.
- Painting in poor lighting: Insufficient light makes it easy to miss spots or leave streaks. Use work lights if needed.
- Standing directly under your work: This strains your neck and increases the chance of paint in your face. Stand slightly back and use an extension pole for comfort.
- Not feathering edges: Abrupt stops create visible lines. Lightly lift the roller at the end of each stroke to blend edges.
Being aware of these pitfalls can save you time, effort, and the frustration of having to fix visible mistakes later on.
Ceiling Paint Maintenance: Keeping It Looking Fresh
Properly painted ceilings can look great for years, but a little maintenance goes a long way. Here’s how to keep your ceiling looking its best:
- Dust regularly: Use a microfiber duster or a vacuum with a soft brush attachment to gently remove dust and cobwebs.
- Address stains promptly: For water stains or smoke marks, clean with a mild detergent and water. If stains persist, spot-prime and touch up with ceiling paint.
- Avoid harsh chemicals: Most ceiling paints are not designed for scrubbing. Use gentle, circular motions and a damp cloth for cleaning.
- Monitor for cracks or peeling: If you notice peeling paint or cracks, investigate for moisture issues and repair as needed to prevent further damage.
- Touch up carefully: When touching up, use the same paint and application method as the original to avoid mismatched sheen or texture.
Routine care is simple but makes a noticeable difference, especially in kitchens and bathrooms where ceilings are prone to staining and humidity damage.
Frequently Asked Questions About Painting Ceilings
How do I avoid roller marks on my ceiling?
Roller marks, or lap marks, are usually caused by letting the edge of your painted section dry before overlapping with the next pass. To avoid them, work in small sections and always maintain a wet edge. Use a quality roller cover and apply even pressure. Feather out each stroke by lifting the roller slightly at the end to blend the edges.
Is it better to use a flat or matte paint for ceilings?
Flat and matte paints are both good choices for ceilings because they hide imperfections and reduce glare. Most ceiling-specific paints are formulated with a flat finish for this reason. Avoid eggshell or satin finishes on ceilings unless you want a slight sheen, which can highlight flaws.
How can I reduce neck and shoulder pain while painting overhead?
Use an adjustable extension pole so you can paint while standing comfortably on the floor. Take frequent breaks to stretch your neck and shoulders, and switch arms periodically. If possible, use a lightweight roller and avoid overreaching or craning your neck directly upward for extended periods.
What’s the best way to paint around light fixtures and ceiling fans?
Turn off the power, then remove or cover fixtures with plastic and painter’s tape. Use an angled trim brush or a paint edger to carefully cut in around the fixtures before rolling the rest of the ceiling. If fixtures are difficult to remove, work slowly and keep a damp cloth handy to wipe away accidental splatters.
Can I paint over a popcorn ceiling?
Yes, but use a gentle touch and a thick-nap roller (at least 3/4″) to avoid dislodging the texture. Never use a sprayer unless the popcorn is confirmed to be asbestos-free. If the ceiling is damaged or peeling, address repairs first. For best results, consider a ceiling paint specifically formulated for textured surfaces.
How long should I wait before removing painter’s tape?
Remove painter’s tape while the paint is still slightly tacky (usually within an hour of finishing the last coat). If the paint dries completely, score the edge with a utility knife to prevent peeling. Pull tape off slowly at a 45-degree angle for the cleanest line.
Do I really need to prime my ceiling?
Priming is essential if you’re covering stains, patches, or going from a dark to a light color. For previously painted, unstained ceilings in good condition, you may be able to skip primer. When in doubt, spot-prime problem areas to ensure uniform coverage and color.
Pro Tips for a Flawless Ceiling Finish
- Start at the corner farthest from the door: This way, you work your way out and avoid walking under freshly painted areas.
- Use long, overlapping strokes: This helps blend each roller pass and minimizes visible lines.
- Work quickly but methodically: Keeping a wet edge is key to a seamless finish.
- Check your work from multiple angles: Lighting can reveal missed spots or streaks, so inspect the ceiling from different parts of the room before the paint fully dries.
- Don’t overload the roller: Dip only the roller’s nap, not the entire roller, to prevent drips and splatter.
With these strategies, you’ll not only achieve a professional-looking ceiling but also reduce the physical strain often associated with overhead painting.
Our content is researched and drafted with AI assistance and reviewed by our team. Product details come from published specs, manufacturer information and owner reviews.