
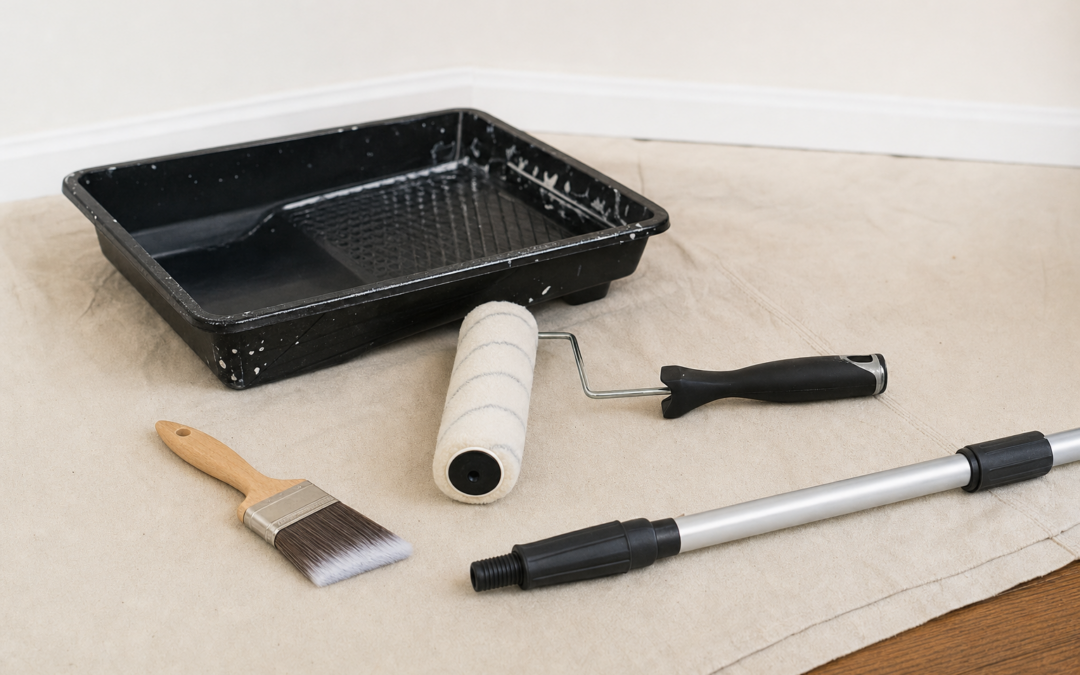
Brush and roller choice shows up in every stroke: fuzzy walls, ridges at cut-ins, and lint in the finish usually come from the wrong nap, a worn cover, or a cheap brush that flares. This 2026 guide covers the best brush and roller setups for walls and trim, including frames, extension poles, and when to replace covers.
Pair this with prep advice in our Painting & Wall Prep hub. Below we focus on application gear that lays paint on cleanly.
What Separates a Clean Cut-In From a Messy One
Cutting in is brush work along ceilings, corners, and trim. An angled sash brush with tapered filaments holds a sharp line. Load the brush one-third of the filament length, tap—not wipe—excess, and move steadily. Tip the brush so the long side rides the line.
Natural bristles suit oil alkyds; synthetic filaments suit latex. Most modern wall painting is latex, so quality synthetic angled brushes are the default homeowner buy.

Purdy XL Glide 2 in. Angular Trim Paint Brush — The Purdy XL Glide 2-inch angular trim brush is a cut-in favorite: it holds a clean edge on trim and ceilings when you load it properly and keep the ferrule clean. Worth buying once instead of fighting disposable brushes.
Roller Naps: Matching Texture and Sheen
Nap thickness changes how much paint you move and how much texture you leave:
- 1/4 inch: smooth walls, doors, cabinets
- 3/8 inch: everyday interior walls in decent condition
- 1/2 inch: light texture and most builder-grade walls
- 3/4 inch+: heavy texture, stucco-like surfaces
Too thick a nap on smooth walls leaves stipple you did not want. Too thin a nap on texture misses valleys and forces extra coats. When unsure indoors, 3/8 or 1/2 inch covers most suburban drywall.
Frames, Covers, and Extension Poles
A sturdy 9-inch frame that actually grips the cover beats a flexy dollar-store cage. Bent frames leave uneven pressure and tracks. If the frame wobbles, replace it—covers cannot fix a warped cage.

Wooster Brush R017-9 Sherlock Roller Frame, 9-Inch — A Wooster Sherlock-style 9-inch roller frame is the kind of rigid cage that keeps covers spinning true. Pair it with quality covers and you will feel the difference on long wall passes.

Shur-Line Extension Pole 30" — A Shur-Line extension pole (around 30 inches for many SKUs) saves shoulders on walls and ceilings. Lock it firmly into the frame; a slipping pole creates roller marks and fatigue.
Extension poles are not optional for ceilings and upper walls if you value even pressure. Keep your stance balanced and roll in controlled W or M patterns, then fill without lifting the roller dry.
Edgers: Helpful Assist, Not a Substitute
Pad edgers can speed long runs along ceilings for some DIYers. Keep pads clean, do not overload, and still expect to refine corners with a brush. Replace glazed pads instead of forcing them.

Shur Line Paint Edger Replacement Pads — Shur-Line edger replacement pads matter because a clogged pad drags and skips. Keep spares so you are not mid-room with a hardened rectangle of yesterday’s latex.
Brush Shapes and Sizes That Earn a Spot
- 2–2.5 inch angled sash: primary cut-in brush
- 3 inch flat: larger trim and doors
- 1–1.5 inch angled: tight window bars and detailed trim
Do not buy twelve brushes. Buy two excellent ones and maintain them. Clean latex brushes with warm soapy water until runoff is clear; reshape filaments; hang or lay flat to dry.
Roller Technique That Avoids Tracks
Prime the cover: wet with water for latex, then spin out thoroughly so the cover is damp, not dripping. Load evenly in the tray. Start a few inches from the edge, roll to distribute, and keep a wet edge. Work in three-foot sections. Avoid pressing hard—pressure squeezes paint out the edges and creates lines.
Reload before the roller sounds dry and scratchy. Dry rolling creates haze and holidays that only show after you clean up.
When to Replace Covers and Brushes
Replace roller covers when they shed lint, harden, or leave mat patterns. Cheap covers often shed on first use—rinse and roll off lint on scrap before the real wall, or start with better covers.
Replace brushes when filaments flare permanently, fall out, or refuse to hold a tip. A $15–$20 brush that lasts years beats five throwaways that spray bristles into the finish.
Ceilings, Walls, and Trim: Order of Operations
- Cut in ceilings; roll ceilings
- Cut in walls at ceiling, corners, and trim
- Roll walls
- Paint trim last for the crispest edge (or tape if you prefer)
Some prefer painting trim first and taping it off. Either works if you control edges. Consistency matters more than ideology.
Sheen and Tool Marks
Higher sheens (satin, semi-gloss) show roller stipple and brush marks more than flat or eggshell. Use smoother naps, lighter coats, and longer open times (cool rooms help) when painting doors and trim in semi-gloss. Do not overwork drying paint.
Budget Setup That Still Looks Pro
Spend on: one angled Purdy-class brush, one rigid 9-inch frame, several quality covers matched to your walls, and an extension pole. Save on: trays (or use liners), disposable cups for small pours, and plastic sheeting.
That kit outperforms a giant bargain bin assortment of flared brushes and limp frames.
Cleanup and Storage
For overnight pauses with latex, wrap brushes and covers tightly in plastic wrap or foil to keep them wet. For full cleanup, wash until clear, then store covers on the frame or in a way that does not crush the nap. Hang brushes or use a brush keeper so tips dry straight.
Never leave brushes standing on their filaments in a can of water overnight—that permanently bends the tip.
Common Application Mistakes
Using a 3/4-inch nap on smooth walls. Cutting in with an overloaded brush. Rolling too far from the cut-in wet edge so lap marks show. Reusing a cover caked with half-dried paint. Skipping the extension pole and painting overhead with a short handle until your shoulders shake.
Fix tools first; technique improves faster with gear that cooperates.
FAQ: Brushes and Rollers
Foam rollers?
Useful for doors, cabinets, and smooth finishes. Less ideal for large textured walls. Watch for bubbles and do not overwork.
Is a microfiber cover worth it?
Often yes for smoother laydown and less lint. Match nap to texture as usual.
Why do I see flashing after rolling?
Uneven porosity, skipped primer on patches, or inconsistent film thickness. Prep and even rolling pressure matter as much as brand of paint.
Can I cut in with a roller edger only?
Sometimes on long straight runs; still keep a brush for corners, profiles, and corrections.
Next Steps
Build a small kit around a sharp angled brush, a rigid 9-inch frame, the right nap covers, and an extension pole. Compare the reviewed tools above, retire shedding covers, and your walls will look like you hired someone—even when you did not.
Continue through our Painting & Wall Prep hub for prep and room workflow. Clean application starts with tools that hold an edge and roll on an even film.
Extra Practical Notes for Best Paint Brushes and Rollers for Walls & Trim
Keep a dedicated “paint day” tote with screwdrivers for outlet plates, spare liners, rags, and a mini flashlight for closets. Staging tools reduces trips that track dust back onto wet edges. Photograph the room before you start so you remember furniture spacing and outlet locations when reassembly fatigue hits.
If you share tools across projects, label leftover paint cans with the room name, sheen, brand, and date. Future touch-ups fail when you cannot match a mystery beige from three years ago. Store cans away from freezing garages; frozen latex can ruin film formation even if it looks stir-able.
Finally, schedule buffer time. Rooms almost always need a second look the next morning under different light. A fifteen-minute holiday fix before furniture returns is cheaper than living with a missed spot behind the couch for a year.
Filament Technology Without Marketing Fog
Modern synthetic filaments are engineered to mimic flaggable tips that hold paint and release evenly. Chinex-style and similar blends are popular for latex. Softness vs stiffness is a tradeoff: softer tips can lay smoother enamel; slightly stiffer tips push paint into texture. Try a reputable angled brush and learn it rather than collecting every blend name.
Cheap brushes often have poorly secured filaments that end up stuck in your door finish. Spending once is rational.
Tray Setup and Paint Conditioning
Use liners for quick color changes. Do not overload the well so deeply that the roller submerges past the core. Mix paint thoroughly; settled solids cause flashing. If paint is cold and thick, let it warm to room temperature. Conditioners can help open time on dry days—follow paint brand guidance.
Strain old paint through a mesh filter if you see skins or chips. A single dried skin chunk can leave a comet across an otherwise perfect wall.
Working Overhead Without Ruining the Job
Ceilings demand a pole, a light nap matched to texture, and eye protection. Cut in edges first, then roll quickly. Paint cool ceilings before warm walls if both are open so drips from above do not hit finished work. Keep a damp rag for instant splatters on trim.
Fatigue causes sloppy overlaps. Schedule ceiling work when you are fresh, not at 10 p.m. after furniture moving.
Lint Control Rituals
Before first use, vacuum covers, wrap with tape sticky-side out, and peel to pull loose fibers. Roll out on scrap cardboard. If a cover still sheds, replace it. Lint removal from semi-gloss doors is miserable.
Wash new cheap brushes too—manufacturing dust is real.
Matching Tools to Paint Chemistry
Waterborne alkyds and hybrid enamels behave differently from builder flat latex. They may need smoother application tools and careful recoat windows. Read the can. Using a heavy texture nap with a leveling enamel fights the product.
Oil-based coatings need natural bristle brushes and solvent cleanup. Do not ruin your latex brush set in alkyd without planning cleanup supplies.
Ergonomics and Long Sessions
Swap hands when possible, use a pole to keep shoulders down, and take micro-breaks. A quality frame with a comfortable grip reduces blister-induced technique collapse. Gloves can help with cleanup but may reduce fine brush feel—decide per task.
Keep the room bright. Dim lighting causes overworking areas you cannot see clearly.
Seasonal Timing and Indoor Climate
Paint and prep materials behave differently in midwinter dryness versus August humidity. In dry heated homes, paint can set too fast at edges and show lap marks—work in smaller sections and consider an additive designed for your paint brand. In humid weather, extend dry times between compound coats, primer, and finish. A moisture meter is overkill for most walls, but your hand and the clock are not: if compound feels cool and soft, wait.
Open windows when weather allows, but avoid gusts that blow grit onto tacky surfaces. Box fans pointed out a window can help, as long as they do not blast dust from a dirty filter onto wet paint. Turn off ceiling fans while coats are open; swirling air feels nice and creates stipple patterns you did not choose.
Store materials overnight in the same climate as the room. Paint that sat in a freezing car overnight can lose performance even after it seems thawed. Compound stored in a hot shed can dry in the tub. Treat chemistry gently and your finish looks expensive.
Documentation Habits for Future You
Write the date, brand, color name, sheen, and store tint code on the lid and on a piece of tape inside the linen closet. Snap a photo of the wet paint stickers. Future touch-ups and whole-room refreshes become trivial when you are not guessing which “agreeable beige” you used. Keep receipts for specialty primers too—matching a stain-blocking product matters when a leak scar returns.
If you share a home with others, leave a one-page note: which walls were primed, which caulk was used on baths, and which ladder setup worked for the stairwell. The next project starts faster when tribal knowledge is written down.
Mindset: Slow Is Smooth
Most DIY paint frustration comes from rushing the dull steps. Cleaning, sanding, masking, and dry times feel unproductive until you skip them and watch a finish fail. Build deliberate pauses into the plan. Use dry time to clean tools, refill ice water, and inspect with a work light. That rhythm produces better rooms than frantic rolling until midnight.
Measure success by even sheen, clean edges, and durability after a month of living—not by how fast the cans emptied. When neighbors ask who painted, you can say you did—and mean it as a compliment.
Tool Maintenance Between Coats
Wrap brushes and roller covers tightly in plastic wrap or sealable bags if you will resume within a day. For longer breaks, wash latex tools fully until the water runs clear, then reshape brush tips and let covers dry without crushing the nap. A hardened cover cannot be revived into a lint-free applicator. Keep a dedicated bucket and brush comb in your paint kit so cleanup is not improvised in the kitchen sink with a mess left behind.
Inspect extension pole threads and roller frame spring clips before each session. A loose pole that unscrews mid-ceiling pass leaves a commemorative streak. A few drops of light oil on metal threads once a season prevents freezing up in humid storage. Small maintenance habits keep the checklist moving when you would rather be painting than troubleshooting gear.
Light, Sightlines, and Final Judgment
Evaluate finish under the same lights you live with, then add a temporary work light at a sharp angle to catch holidays. Flat afternoon sun through a window can flatter a wall that evening lamps will criticize. Walk the room slowly after each coat. Mark misses with blue tape tabs so you do not lose them when you go mix paint. This inspection habit is faster than living with ghosts behind furniture for years.
If two coats still look uneven, ask whether the cause is porosity, color change, or application. More paint is not always the answer—sometimes another primer spot coat is. Diagnosing before flooding the wall with extra material saves money and drying time.