
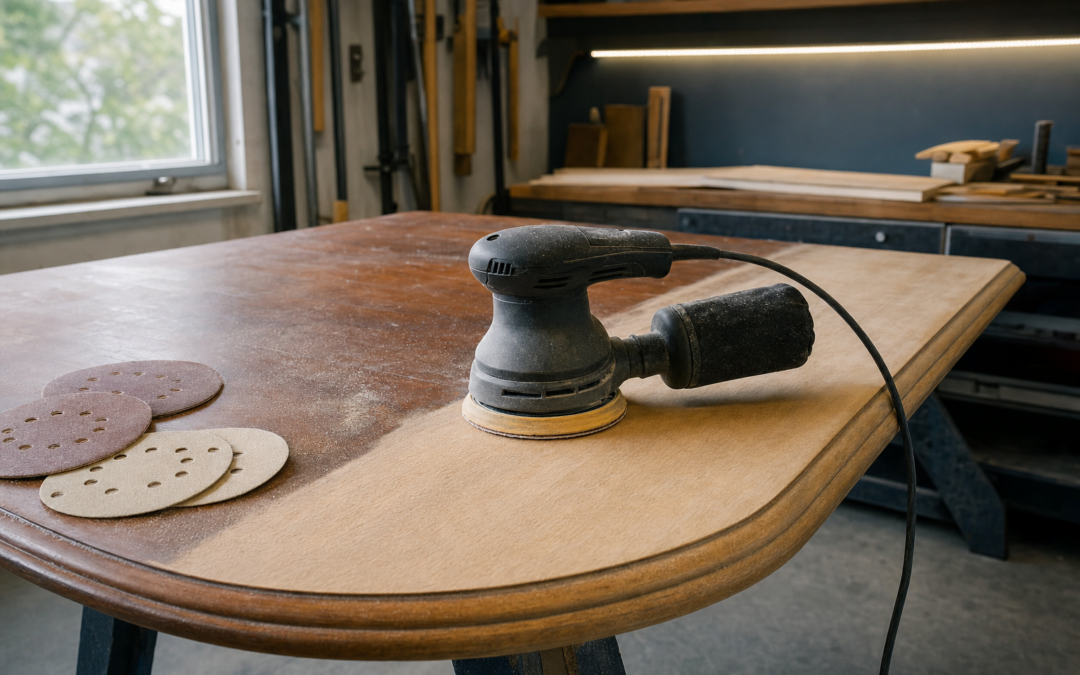
Paint prep and furniture refinishing fail in the same place: swirl marks, skipped grit steps, and dust that settles back into wet finish. A random-orbit sander (often called an orbital sander in homeowner listings) is the tool that fixes those problems when you use it with patience and a grit plan. This 2026 guide compares random-orbit sanders for DIY furniture and trim—dust control, pads, corded vs cordless, and how to avoid the glossy mistakes that show under angled light.
Browse related tools on our Power Tools hub. Below we stay on sanding workflow and the reviewed models that fit furniture and trim work.
Why Random-Orbit Beats “Elbow Grease Only”
Hand sanding still matters on edges and tiny profiles, but large flats punish wrists and leave uneven sheen. Random-orbit sanders move the pad in a pattern that reduces visible circular scratches compared with old-school straight orbit palm sanders. They do not replace belt sanders for aggressive stock removal, and they do not replace detail tools for tight spindles—but for tabletops, doors, face frames, and trim flats, they are the homeowner sweet spot.
- Best for: paint prep, stain prep, leveling finish between coats, flushing wood plugs
- Poor fit for: deep stock removal, metal grinding, soaking-wet outdoor decks without the right abrasive system
- Success factors: grit progression, dust extraction, pad condition, keeping the tool flat
Grit Progression Without Swirl Drama
Most DIY disasters come from jumping grits. A simple furniture-friendly ladder:
- Start at 80–100 only if you must remove old finish or level serious ridges
- Move to 120–150 to erase previous scratches
- Finish at 180–220 before stain or primer, depending on species and finish system
- Between finish coats, use fine grits or finishing pads as the product label directs
Change discs when they glaze or tear. A dull disc burns polish into softwoods and polishes hard spots unevenly. Write the grit on the disc backing with a pencil if packaging is ambiguous after you mix boxes.
Dust Collection: Your Lungs and Your Finish
Dust is not only a health issue—it is a finish defect factory. Prefer sanders with a usable dust port and either an efficient bag or a hose adapter for a shop vac or dust extractor. Foam collar adapters are cheap insurance when the port diameter does not match your vac hose perfectly.
Empty bags early. A packed bag reduces suction and leaves scratches you will blame on technique. If you sand indoors, isolate the room, shut HVAC returns if appropriate, and vacuum between grit changes—not only at the end.
Corded vs Cordless for Furniture and Trim
Corded wins for multi-hour tabletops and door runs: constant power, usually lower cost per sanding hour, no battery swaps mid-panel. Cordless wins for punch-list work around a finished house—touching baseboards, flushing plugs on installed trim, and sanding in rooms where cords scratch floors.
If you already live on a 20V platform, a tool-only cordless sander can be a rational add-on. If sanding is your main near-term project and you own no batteries, a corded kit often delivers more sanding per dollar.
Pad Size, Hook-and-Loop, and Disc Systems
Five-inch random-orbit sanders dominate DIY shelves. Eight-hole patterns are common for dust extraction—match discs to the pad holes. Hook-and-loop discs change fast; keep a spare pad because a damaged hook surface eats discs and leaves tracks.
Variable speed helps on veneers and plastics where high speed melts or burns. Start slower than you think on delicate faces. Let the abrasive cut—leaning hard mostly creates swirls and heat.
Product Callouts: Sanders We Review
Two complementary approaches: a corded 5″ random-orbit for serious sessions, and a cordless tool-only option for platform owners doing mobile prep.

Makita BO5041K 5″ Random Orbit Sander — Corded 5″ random-orbit kit energy for furniture and trim sessions where continuous runtime and dust port connection matter more than cordless convenience.

DEWALT 20V MAX Orbital Sander, Tool Only (DCW210B) — Cordless 20V MAX orbital sander (tool only) for DEWALT platform owners who want to knock down paint ridges and flush plugs without hunting an outlet on every room.
Technique That Separates DIY from “Obvious DIY”
- Keep the pad flat; tipping on edges digs crescent marks
- Move at a steady pace overlapping passes like spray painting
- Do not stay in one spot hoping to erase a dent faster—that hollows the surface
- Sand with the overall plane in mind; check reflections under raking light
- Wipe or vacuum between grits so coarse grit particles do not hitchhike
On paint prep, your goal is adhesion and leveling—not bare wood everywhere. Feather edges of failed paint. On stain prep, scratches become dark tiger stripes—be more meticulous before pigment hits the grain.
Furniture vs Trim: Slightly Different Goals
Furniture flats show swirls under dining-room light. Take the grit ladder seriously and inspect often. Trim, especially primed paint-grade, is more forgiving of tiny scratches but less forgiving of rounded profiles—use light pressure on edges so you do not wave the crisp line of a casing.
For detailed profiles, switch to sanding sponges or by-hand strips after the orbital does the flats. Forcing a five-inch pad into a cove is how you flatten history.
Abrasives Budget and Storage
Buy discs in the grits you will actually sequence, not a random variety pack of extremes. Store discs flat and dry. Contaminated discs that picked up finish residue can scratch mysteriously—retire them.
Cheap discs that shed mineral early cost more than mid-grade discs that last a door’s worth of work. Track cost per project, not cost per sleeve.
Safety and Shop Habits
- Wear a dust respirator rated for fine particles when extraction is imperfect
- Eye protection—disc tears throw debris
- Hearing protection for long sessions
- Mind cords on stairs and finished floors; soft cord sleeves help
- Allow motors to cool; continuous heavy pressure is abuse, not productivity
Lead paint in older homes is a special hazard. If you suspect lead, do not casual-sand—follow local rules and proper containment. Fresh DIY energy is not worth a contamination event.
When to Choose a Different Sander Type
Belt sanders remove material fast and can dish surfaces—leave them for rough work you will flatten later. Detail mouse sanders reach corners. Drum and floor sanders are a different sport entirely. Random-orbit remains the daily driver for furniture and trim flats because it balances speed and surface quality.
Finish-Ready Checklist
- All scratches from the previous grit are gone under raking light
- Dust extracted and wiped with a tack approach suitable to your finish
- Edges still crisp where they should be
- Sample stain or primer on scrap from the same wood or paint system
- Discs and pad inspected so the next coat’s scuff sand does not start with a damaged hook surface
If you only remember one habit, make it raking light. Overhead shop lights hide swirls that afternoon window light will broadcast after stain.
Common Mistakes
- Skipping grits to “save time”
- Pressing down hard enough to stall the pad orbit
- Sanding paint without dust control in a living space
- Using worn pads that leave chunk marks
- Switching to stain before checking with raking light
- Expecting cordless runtime to match a corded marathon without spare batteries
Surface Diagnosis Before You Touch a Disc
Not every rough surface wants the same opening grit. A factory-smooth door that only needs scuff sanding before paint does not need 80 grit. An oak table with deep cupping and failing varnish might need scraping or more aggressive methods before a random-orbit should even start. Diagnose: Are you removing finish, leveling wood, scuffing for adhesion, or polishing between coats?
Water-popping softwoods after final grit can raise fibers before stain—useful on some projects, disastrous if you then skip a light re-sand. Read the finish system you plan to use. Oil, waterborne, and lacquer systems advertise different prep needs; the sander is a servant of that system, not the boss.
Edges, Profiles, and the Flat-Pad Trap
Random-orbit pads are flat. Profiles are not. If you sand a rounded bullnose with the full pad like a tabletop, you create flat facets that catch light. Use the outer portion carefully, drop to hand sanding, or use contoured sponges. On veneered plywood, aggressive grit punches through faces quickly—veneer mistakes are permanent tattoos.
Paint-grade MDF edges drink finish and show fuzz. Sand lightly, prime, and sand again. Trying to “polish” raw MDF edges with fine grit alone often fails; sealing strategy matters more than tool brand.
Shop Setup for Cleaner Air
Place the workpiece at a comfortable height so you are not hunched. Connect extraction before the first pass. If using a shop vac, a HEPA-rated vac or a separator helps. Crack a window and use a box fan blowing out for crude dilution when weather allows—do not pretend a paper mask alone solves fine dust.
Clean the room between grits on finish-critical pieces. Coarse grit left on the bench becomes tomorrow’s mysterious scratch under varnish. A dedicated sanding week in the garage with cars parked outside is often worth the inconvenience.
Repair Strategies Mid-Project
If you burnish a softwood patch shiny, drop back a grit and re-establish a uniform scratch pattern. If you sand through a stain-grade face, you may need to rethink the finish toward paint or accept a patch. Keep scrap from the same board for stain tests; sanding the project to “see how stain looks” without a sample is how regret finishes happen.
For paint prep on previously glossy trim, the goal is mechanical tooth and leveling ridges—not removing every speck of old paint unless lead-safe protocols and time allow. Feather chips so the new film can hide transitions.
Buying Discs Without Waste
Start with sleeves of 80 (only if needed), 120, 150, 180, and 220 in the hole pattern your pad requires. Avoid giant multipacks of unused exotic grits. Note whether your sander prefers multi-hole discs; blocking dust ports with wrong patterns reduces extraction. When a disc loads with finish residue, it is done—continued use smears and scratches.
Hook-and-loop pads wear out. Budget a replacement pad annually if you sand often. A bald pad is invisible until every disc flies off mid-pass.
Comparing Corded Kits vs Tool-Only Cordless in Real Weeks
Imagine refinishing a dining table over a weekend: corded wins. Imagine scuffing baseboards in three furnished rooms: cordless wins if batteries are ready. Many households eventually own both roles—one corded sander that lives with the vac hose, one cordless that lives with the drill batteries. If you must choose one this month, pick based on the next project’s location and duration, not on which product photo looks more premium.
Field Notes From Real Garage Constraints
Real garages are cold in winter, hot in summer, and short on outlets. Plan extension cords rated for the tool load, keep cords out of blade paths, and do not run undersized cords that starve motors. Seasonal humidity warps lumber stored on concrete—sticker your boards and let them acclimate before critical cuts or finish sanding.
Lighting changes perceived quality. Add a bright shop light before you blame tools for wandering holes or missed layout lines. A $30 lighting improvement often upgrades every tool you already own. Keep a broom and vac habit so sawdust does not turn into a slip plane under a miter stand.
When storage is tight, vertical holsters and wall hooks beat floor piles. A charged battery on a known shelf is a project multiplier; a buried kit under holiday bins is how DIY weekends die. Revisit your layout each season as projects change—deck season wants different access than interior paint season.
Finally, write down what you bought and why. Six months later you will forget which battery platform you chose and why the corded sander was intentional. A simple note in your phone prevents duplicate purchases when a flashy kit goes on sale in a competing chemistry.
Scheduling Sanding Around Finish Chemistry
Sanding is not only mechanical—it is timed to the finish you will apply. Oil finishes may want a different final grit than film finishes that sit on top of the wood. If you sand to an ultra-fine polish and then apply a finish that needs tooth, adhesion suffers. Conversely, leaving coarse scratches under a clear coat creates telegraphed lines that show in raking light for years.
Plan the full sequence: strip or sand, raise grain if needed, final grit, dust removal, finish, cure, de-nib, next coat. The sander appears in multiple steps. Rushing the dust-removal step after the last grit undoes careful abrasion. Use a vacuum and a tack method compatible with your finish—some solvents in tack rags can interfere with waterborne systems, so follow product guidance.
Temperature and humidity change how wood feels under the pad. Softwoods gum discs on humid sticky days; take lighter passes and change discs more often. Cold garages make plastic housings and hoses brittle—warm the space before marathon sessions when you can.
FAQ: Orbital Sanders for DIY
Is random-orbit the same as orbital?
Homeowner listings often say orbital when they mean random-orbit. True random-orbit pads both spin and oscillate randomly to reduce swirl patterns versus basic palm orbit sanders.
What grit before painting?
Often 120–180 on bare wood or feathered paint, then follow primer/paint guidelines. Flat enamel shows defects—prep more carefully for trim that will be semi-gloss.
Corded or cordless?
Corded for long furniture sessions; cordless for mobile touch-ups if you already own the battery platform.
Do I need a shop vac?
Strongly recommended. Bags help, but vac extraction keeps air and finish cleaner.
Why do I still see swirls?
Usually skipped grit, tilted pad, dull disc, or contamination from coarser grit dust. Back up one grit and fix process before climbing again.
Next Steps
Pick corded vs cordless from your project length and battery shelf, then commit to a grit sequence and dust plan before you buy discs in bulk. Compare the reviewed sanders above and open the full notes for pad and dust-port details.
More prep and cutting tools live in our Power Tools hub. Smooth furniture is less about aggressive machines and more about disciplined abrasives—let the random-orbit do the boring, even work.