
A bathroom faucet upgrade is one of the fastest ways to make a tired vanity look intentional—if the new fixture matches your sink’s hole pattern, drain needs, and finish family. Centerset faucets dominate many builder baths; widespread sets suit larger decks; single-hole models keep modern vessel and integral sinks clean. This 2026 guide covers fit, finishes, drain assemblies, and DIY swap basics so you do not discover a hole mismatch after the old faucet is already in the trash.
Browse related projects in our Bathroom Upgrades hub. We stay focused on bathroom lavatory faucets here. For kitchen pull-downs and side sprayers, see our plumbing guides in the Plumbing hub. If shower spray is next on your list, pair this work with our guide to the best shower heads for pressure in 2026.
Centerset vs Widespread vs Single-Hole
Centerset faucets combine spout and handles on a single base, typically spanning four inches center-to-center—perfect for many oval and rectangular vanity sinks with three holes close together. Widespread sets use separate spout and handle valves spaced eight inches (or more) apart for larger decks and a more custom look. Single-hole faucets use one opening; some include an optional deck plate to cover unused outer holes when you are retiring a three-hole setup.
Measure before you browse finishes. Hole count and spacing are structural facts; brushed nickel preferences are not. If your sink is integral to the vanity top, you usually cannot drill new holes safely—match what exists.
- Centerset (4-inch): common builder baths, compact vanities
- Widespread (8-inch): larger decks, separate valves
- Single-hole: modern look, optional deck plate for covering old holes
- Vessel fillers: taller spouts for above-counter bowls—confirm reach and splash
- Wall-mount: rough-in dependent; rarely a same-day DIY swap
Finishes, Handles, and Daily Wipe-Down Reality
Chrome remains the easiest wipe-down finish in hard-water homes. Brushed nickel and stainless-look PVD finishes hide spots better but still need non-abrasive cloths. Matte black photographs beautifully and shows toothpaste splatters clearly—plan a nightly wipe habit or accept a lived-in look.
Lever handles are easier with wet or soapy hands than tiny cross handles. If kids or guests use the bath, clear hot/cold orientation and a comfortable reach over the bowl matter more than matching a magazine photo.
Match metal tones loosely with shower trim, towel bars, and mirror frames. Perfect catalog matches across years of product lines are rare; “same family” is enough for a cohesive room.

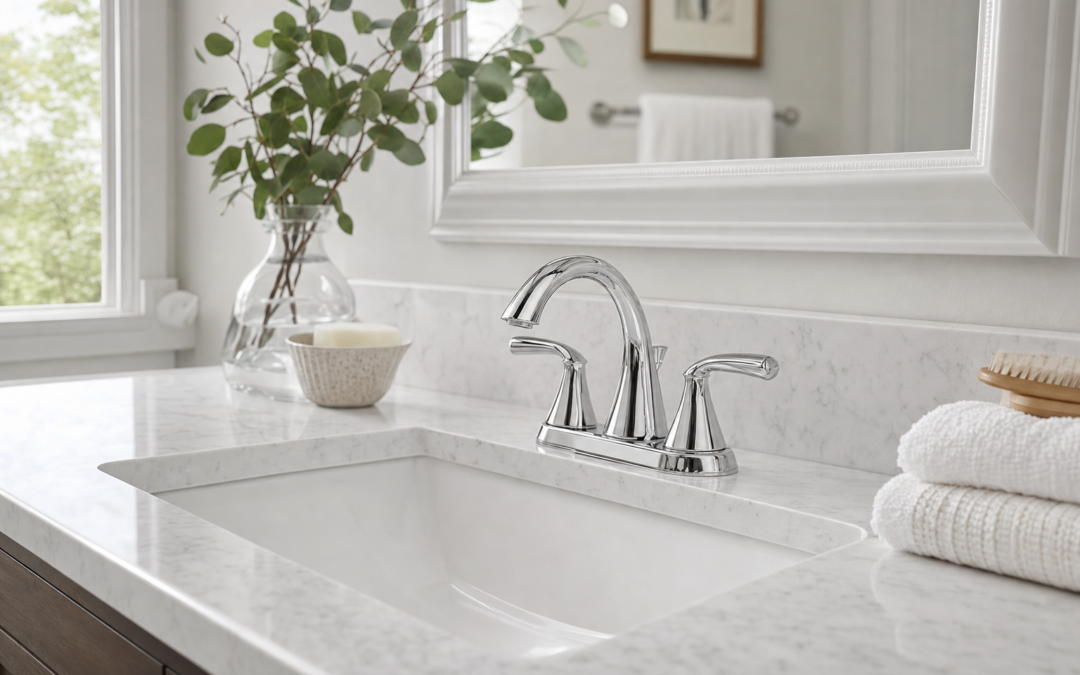
Moen Idora Chrome Two-Handle Centerset Bathroom Sink Faucet with Drain — A chrome two-handle centerset with a matching drain assembly is a practical upgrade for many standard three-hole vanity sinks—confirm the four-inch spread, pop-up drain inclusion, and shank clearance under your sink deck before you buy.
Drain Assemblies: The Forgotten Half of the Swap
Many bathroom faucet boxes include a pop-up drain. Others assume you will reuse the existing drain or buy one separately. Mismatched finishes between faucet and drain look unfinished. Lift rods and pivots that never quite seal create slow drips into the cabinet—exactly where particleboard fails.
When you remove the old drain, clean the sink opening thoroughly. Old putty and mineral rings prevent a flat seal. Use plumber’s putty or the manufacturer’s gasket as directed—some stone and solid-surface sinks prohibit oil-based putty. Hand-tighten, then snug; overtightening cracks porcelain flanges.
Test the pop-up open and closed with the bowl half full before you call the job done. Adjust the clevis strap so the stopper seats fully without binding.
Supply Lines, Shutoffs, and Under-Vanity Clearance
Shut off hot and cold angle stops. Open the faucet to relieve pressure. Place a towel-lined pan under the connections. Photograph the hookups. Disconnect supplies—replace cracked or stiff lines rather than reusing decade-old tubing. Typical connections are 3/8-inch compression; verify your faucet shank threads and any included adapters.
Basin wrenches earn their keep when mounting nuts sit deep behind a bowl. Clean the deck, set gaskets, and tighten evenly so the faucet base does not spin when you turn handles later.
Leave room under the sink for the drain body, supply loops, and any organizer. A beautiful faucet swap that blocks the shutoffs is a future emergency problem. If you are also organizing the vanity, measure after the new drain is in place—not before.
DIY Swap Walkthrough
1. Confirm hole pattern and buy the matching configuration. 2. Shut off water, relieve pressure, disconnect supplies. 3. Disconnect the lift rod and pivot from the old drain if linked. 4. Loosen faucet mounting nuts and lift out the old fixture. 5. Remove the old drain from below; clean the sink opening. 6. Install the new drain per instructions; then set the faucet with gaskets aligned. 7. Connect new supply lines, restore water slowly, and check every joint with a dry paper towel. 8. Fill the bowl, test the stopper, and watch the cabinet floor for fifteen minutes.
If an angle stop will not shut down fully, close the main and replace the stop—or hire a plumber. Fighting a failing valve turns a two-hour upgrade into a flood.
Caulk a thin bead around the faucet base if the manufacturer recommends it for your sink material. Wipe excess immediately so you do not create a grimy gasket of dried caulk on day one.
Pairing With the Rest of the Bathroom
Faucet height should clear your tallest soap dispenser without looking like a kitchen spout. Spout reach should land near the center of the bowl—not on the rear rim where water hammers the deck. If your vanity mirror lights create glare on polished chrome, brushed finishes can reduce sparkle fatigue.
Planning a broader refresh? A new shower head and a calmer vanity often read as a full remodel to guests. See our shower head pressure guide and the weekend bathroom upgrades article in this same Bathroom Upgrades series. Keep toilet issues on a separate track—if the tank runs constantly, fix that water waste with our running toilet DIY guide before you celebrate the new chrome.
Hard water? Budget aerator cleaning and a gentle descaling routine. A brand-new faucet with a clogged aerator feels “low pressure” on day three.
Design Tips When Product Choices Are Limited
Even with a short shortlist, you can make the upgrade feel designed. Align handle style with shower trim levers. Repeat the metal finish on a towel ring and toilet paper holder rather than mixing five tones. Choose a spout silhouette that echoes the mirror shape—soft arcs with oval mirrors, squarer geometry with rectangular frames.
Photograph the vanity in daylight and evening light before ordering. Chrome that looks crisp at noon can glare under vanity bulbs at night. If you rent, confirm you can restore the original faucet; keep all old parts bagged and labeled.
Vessel sinks need special height attention: too short a spout creates splash; too tall creates a hose-like stream that misses the drain when the stopper is closed. Dry-fit cardboard height mockups if you are unsure.
Mistakes That Cause Leaks and Regret
Ignoring hole spacing forces returns or awkward deck plates. Reusing ancient supply lines invites drips inside the vanity. Overtightening drain flanges cracks porcelain. Skipping the bowl leak test hides pivot seal failures until the cabinet floor swells. Mixing oil-based putty with stone sinks can stain—read both the faucet and sink guidance. Blocking shutoffs with organizers turns a small leak into a cascade.
Habits That Keep Bathroom Upgrades Working
Wipe chrome and glass after showers so mineral spots do not etch finishes. Run the exhaust fan during every shower and for twenty minutes after. Wipe shower caddy shelves weekly so soap scum does not glue bottles in place. Unscrew and soak aerators in vinegar periodically if streams feather or weaken, and wipe the faucet daily in hard-water homes so spots do not become permanent etching.
Twice a year, open the vanity and check supply connections, P-trap washers, and under-sink organizers for damp spots. A rusty screw or soft particleboard floor is cheaper to fix than a ruined cabinet. Keep spare flappers, aerator keys, and the original hardware bags labeled by fixture.
Seasonal humidity swings—summer steamy mornings, winter closed windows—are good stress tests. If caulk cracks, fans rattle, or a bidet seat wobbles, schedule a quiet Saturday fix before guests arrive.
Safety, Shutoffs, and Know-Your-Limits
Shut off the water at the angle stops under the sink or behind the toilet (or at the main) before you disconnect supply lines, loosen faucet nuts, or work on a toilet tank. Keep a bucket and towels ready—old valves can weep. Kill power at the breaker before you touch exhaust-fan wiring, heated bidet seats that plug into an outlet, or any junction box in a damp ceiling.
Wear eye protection when cutting metal, scraping caulk overhead, or working under a vanity where debris falls toward your face. Support heavy fans and seats so they cannot drop. If you smell gas, see scorched wiring, find rotten subfloors, or cannot identify shutoffs, stop and hire a licensed plumber or electrician.
Bathrooms combine water and electricity. GFCI protection on receptacles, listed fixtures for wet locations, and vent ducts that actually exit outdoors are not optional “upgrades”—they are how you avoid mold and shock hazards. A weekend project should never defeat a safety device “just to make it fit.”
Buying Checklist
- Count holes and measure center-to-center spacing
- Decide whether a drain assembly is included or must match separately
- Measure spout reach over your bowl’s center
- Plan new supply lines and verify angle stops work
- Match finish loosely to shower trim and accessories
- Confirm under-sink clearance for drain and organizers
- Budget putty/gaskets, basin wrench, and towels
- Leak-test bowl and supplies before reloading the vanity
Install Tips for Awkward Vanities
Pedestal sinks leave almost no workspace—have a helper hold parts and expect more time. Furniture-style vanities with false drawer fronts may need the drawer box removed for wrench access. Narrow cabinets reward a headlamp and a short basin wrench over improvisation with pliers that round nuts.
If supply stops are surface-mounted and ugly, consider decorative shutoff covers only after the new faucet proves leak-free. Do not decorate over an active seep.
Keep a small parts tray magnetized or lined so friction washers do not vanish into the P-trap abyss mid-project.
FAQ: Bathroom Faucet Upgrades
Can I put a single-hole faucet on a three-hole sink?
Often yes, if the faucet includes a deck plate that covers the outer holes cleanly—confirm dimensions against your sink’s hole spread.
How long should a DIY swap take?
One to three hours when stops work and nuts cooperate; longer if the drain is seized or putty has fossilized.
Do I need a plumber?
Yes if shutoffs fail, the sink is cracked, you must open walls, or you find active leaks in the supply stubs.
Why does the new faucet spray sideways?
Usually a misaligned or debris-filled aerator—remove, flush lines briefly into a bucket, clean, and reinstall.
Should faucet and shower trim match exactly?
Same finish family is enough. Exact model matching across brands is optional, not mandatory.
Next Steps
Match holes and drain needs first, finish second. Compare the centerset option above, then continue through storage, fans, and bidet ideas in our Bathroom Upgrades hub. A good bathroom faucet disappears into morning muscle memory: handles do not wobble, the stopper seals, and the cabinet below stays dry.
Keep the old faucet until the new one passes an overnight paper-towel check under every joint. Save finish care cards and cartridge part numbers; popular finishes get discontinued and future-you will want the exact match.
If you are sequencing a full bath refresh, lock faucet and shower trim decisions together, then tackle exhaust and storage so the room feels new without a gut remodel. For shower performance specifically, keep our shower heads pressure guide open while you shop.
Photograph serial stickers and bag the old mounting hardware. When a guest bath needs a quick restore before a showing, that kit is worth more than the receipt.
Practical Notes for Bathroom Faucet Upgrade Guide
Keep receipts, warranty info, and a phone photo of model numbers in a home maintenance album. When a faucet, fan, or seat needs parts years later, identity beats guesswork. Schedule a seasonal reminder to recheck supply lines, wipe fan grilles, and confirm shower storage still sits level under full bottle loads.
If you share the home with guests or renters, label shutoffs clearly and leave a one-page tip sheet in a vanity drawer: how to stop water, which switch runs the exhaust fan, and when to call a plumber instead of forcing a stuck nut. Clear instructions prevent panicked mistakes.
Choose listed fixtures and quality fasteners over mystery-bin parts. Compatibility mistakes and reused cracked supply washers cost more time than the dollars you save.
Practical Notes for Bathroom Faucet Upgrade Guide
Keep receipts, warranty info, and a phone photo of model numbers in a home maintenance album. When a faucet, fan, or seat needs parts years later, identity beats guesswork. Schedule a seasonal reminder to recheck supply lines, wipe fan grilles, and confirm shower storage still sits level under full bottle loads.
If you share the home with guests or renters, label shutoffs clearly and leave a one-page tip sheet in a vanity drawer: how to stop water, which switch runs the exhaust fan, and when to call a plumber instead of forcing a stuck nut. Clear instructions prevent panicked mistakes.
Choose listed fixtures and quality fasteners over mystery-bin parts. Compatibility mistakes and reused cracked supply washers cost more time than the dollars you save.
Practical Notes for Bathroom Faucet Upgrade Guide
Keep receipts, warranty info, and a phone photo of model numbers in a home maintenance album. When a faucet, fan, or seat needs parts years later, identity beats guesswork. Schedule a seasonal reminder to recheck supply lines, wipe fan grilles, and confirm shower storage still sits level under full bottle loads.
If you share the home with guests or renters, label shutoffs clearly and leave a one-page tip sheet in a vanity drawer: how to stop water, which switch runs the exhaust fan, and when to call a plumber instead of forcing a stuck nut. Clear instructions prevent panicked mistakes.
Choose listed fixtures and quality fasteners over mystery-bin parts. Compatibility mistakes and reused cracked supply washers cost more time than the dollars you save.
Practical Notes for Bathroom Faucet Upgrade Guide
Keep receipts, warranty info, and a phone photo of model numbers in a home maintenance album. When a faucet, fan, or seat needs parts years later, identity beats guesswork. Schedule a seasonal reminder to recheck supply lines, wipe fan grilles, and confirm shower storage still sits level under full bottle loads.
If you share the home with guests or renters, label shutoffs clearly and leave a one-page tip sheet in a vanity drawer: how to stop water, which switch runs the exhaust fan, and when to call a plumber instead of forcing a stuck nut. Clear instructions prevent panicked mistakes.
Choose listed fixtures and quality fasteners over mystery-bin parts. Compatibility mistakes and reused cracked supply washers cost more time than the dollars you save.